aamp is a self-hosted control layer for LLM agents. It runs as a single Go binary against a local SQLite database, on infrastructure you operate.
ConsoleThe operator console. Every control plane — Agents, Ingress, Helpers, Knowledge, Workflows, Firewalls, Jobs, Logs and Settings — is reachable from one navigation surface.
The host retains authority
The architecture rests on one principle: the host keeps authority. Provider credentials, policy evaluation, tool attachment, audit logging and retrieval all execute host-side. The model chooses among tools the host has exposed — it does not define its own execution policy.
An agent gets capability. The host keeps the keys, the policy, and the record of what happened.
Five defining properties
Five properties distinguish the design. They are the shape of everything else in these docs.
Agent / Ingress separation
An Agent defines behaviour — model binding, system prompt, attached tools, knowledge, session state. An Ingress defines exposure — transport, authentication, network rules, firewalls. They are separate records with a foreign-key relationship, so the same Agent can be exposed through different transports under different policies, or exist with no external exposure at all.
Depth of governance
A thirty-five permission role-based access model with per-resource grants, LLM safety firewalls at two independent boundaries, and fourteen log domains covering every runtime path. This is the property that separates aamp from self-hosted automation platforms, which offer the deployment model without the control surface.
Selective isolation
Isolation is spent where the risk or dependency surface justifies it — three helper workloads (browser automation, document rendering, and retrieval indexing) run as isolated guest jobs; host-native helpers handle everything else. The engineering judgement is where the boundary is drawn, not that one exists.
Layered policy enforcement
Five independent boundaries — host admin auth, transport ingress controls, LLM safety firewalls, isolated helper execution, and proxy-level network filtering — each enforced by host code, each independently logged.
Audit as a by-product
Fourteen log tables record agent turns, tool calls, model requests with token accounting, firewall verdicts, helper executions, job events, proxy traffic, remote commands, knowledge usage, workflow steps and authorization decisions. Traceability is a property of running the system, not a documentation exercise layered on top.
In short
One process, one database, on hardware you control. The model gets tools; the host keeps authority — and everything it does is recorded as it happens.
Intro/Architecture overview
Architecture overview
The entire control plane is one process. There is no message broker, no container orchestrator, no external cache, no separate vector database. State lives in SQLite and the filesystem.
This is a deliberate trade. It rules out horizontal scaling of the control plane, and it makes single-node deployment, backup and audit trivial — the correct trade for the regulated on-premise environments the platform targets.
Control planes
Separation is structural, not conceptual. Each plane has its own tables, its own service package and its own permission set.
Plane
Responsibility
Agent
Behaviour, model binding, prompts, session state, tool and knowledge attachment
Transport
External exposure, authentication, IP rules, transport firewalls
Tool
Host-native and isolated helpers, attachment contracts
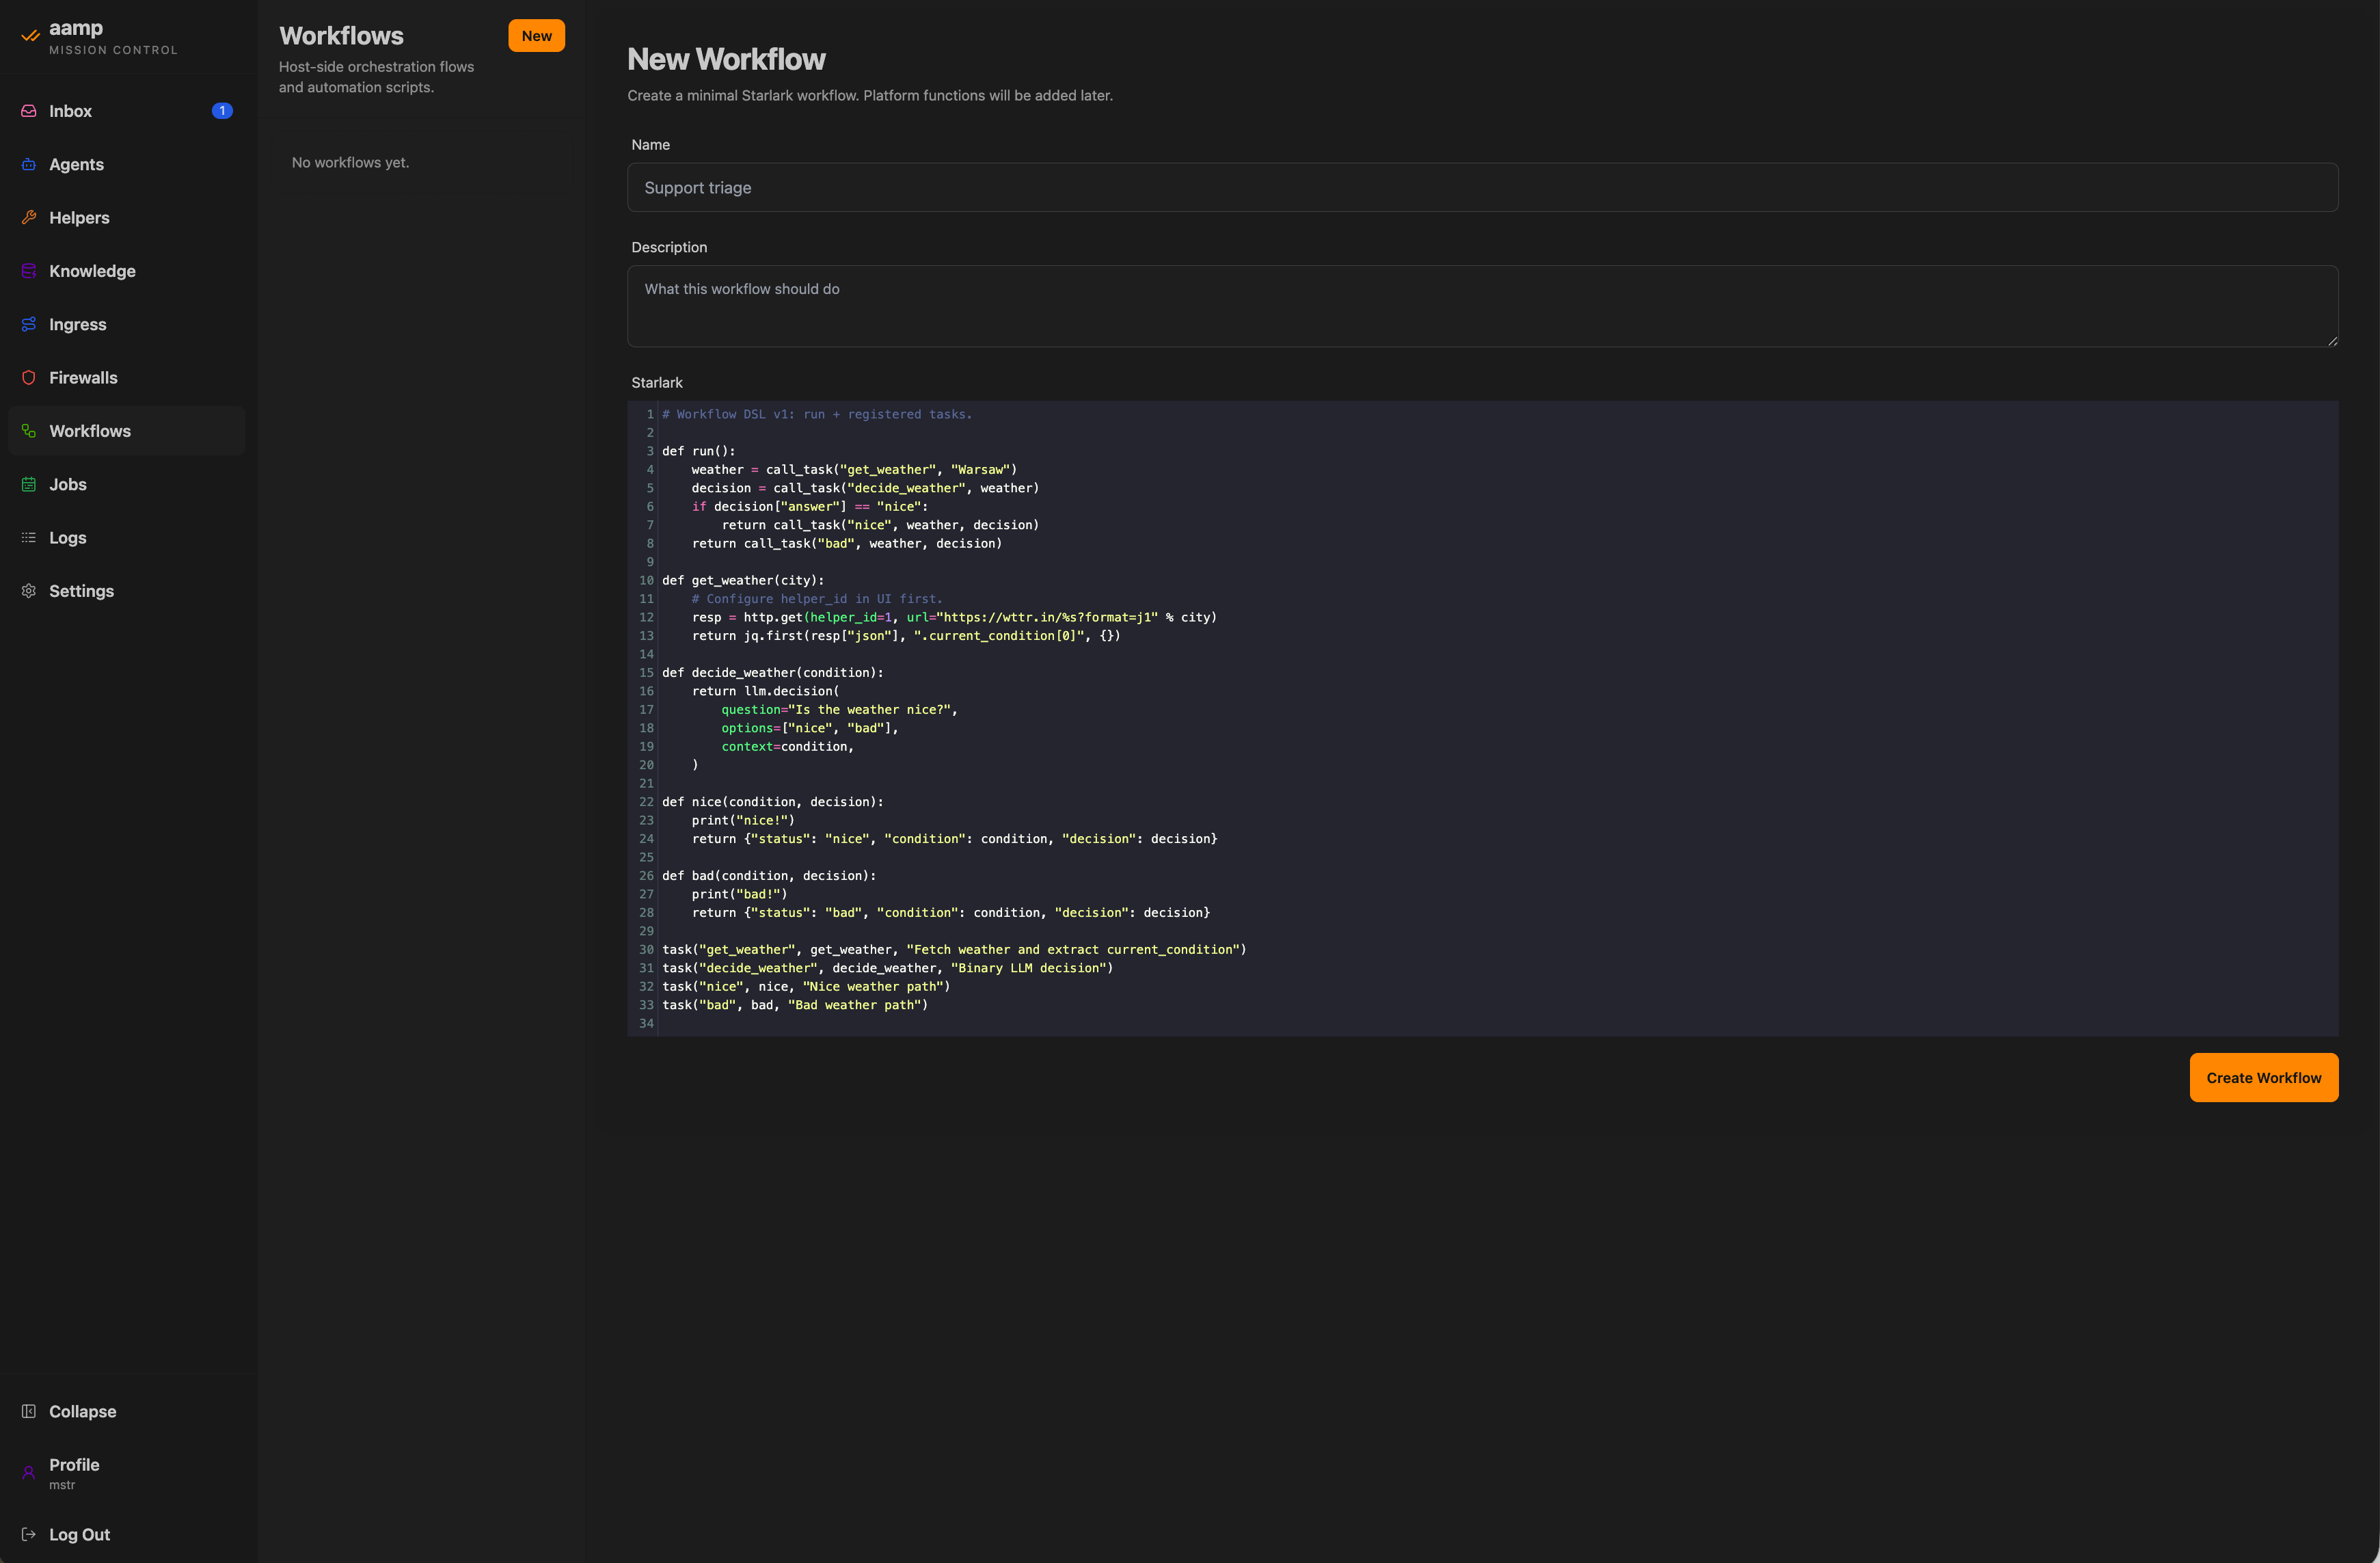
OrchestrationThe workflow editor. A deterministic Starlark program orchestrates call_task steps host-side, with the model invoked as one bounded step rather than the pipeline itself.
The Agent / Ingress model
This is the central architectural decision. An Agent is a host-side configuration record — not a running process — carrying its own provider and model binding, system prompt, context-window and compaction settings, a tool-iteration limit, and firewall bindings. Tools and knowledge attach through explicit join tables, so an agent's surface is enumerable rather than inferred at runtime.
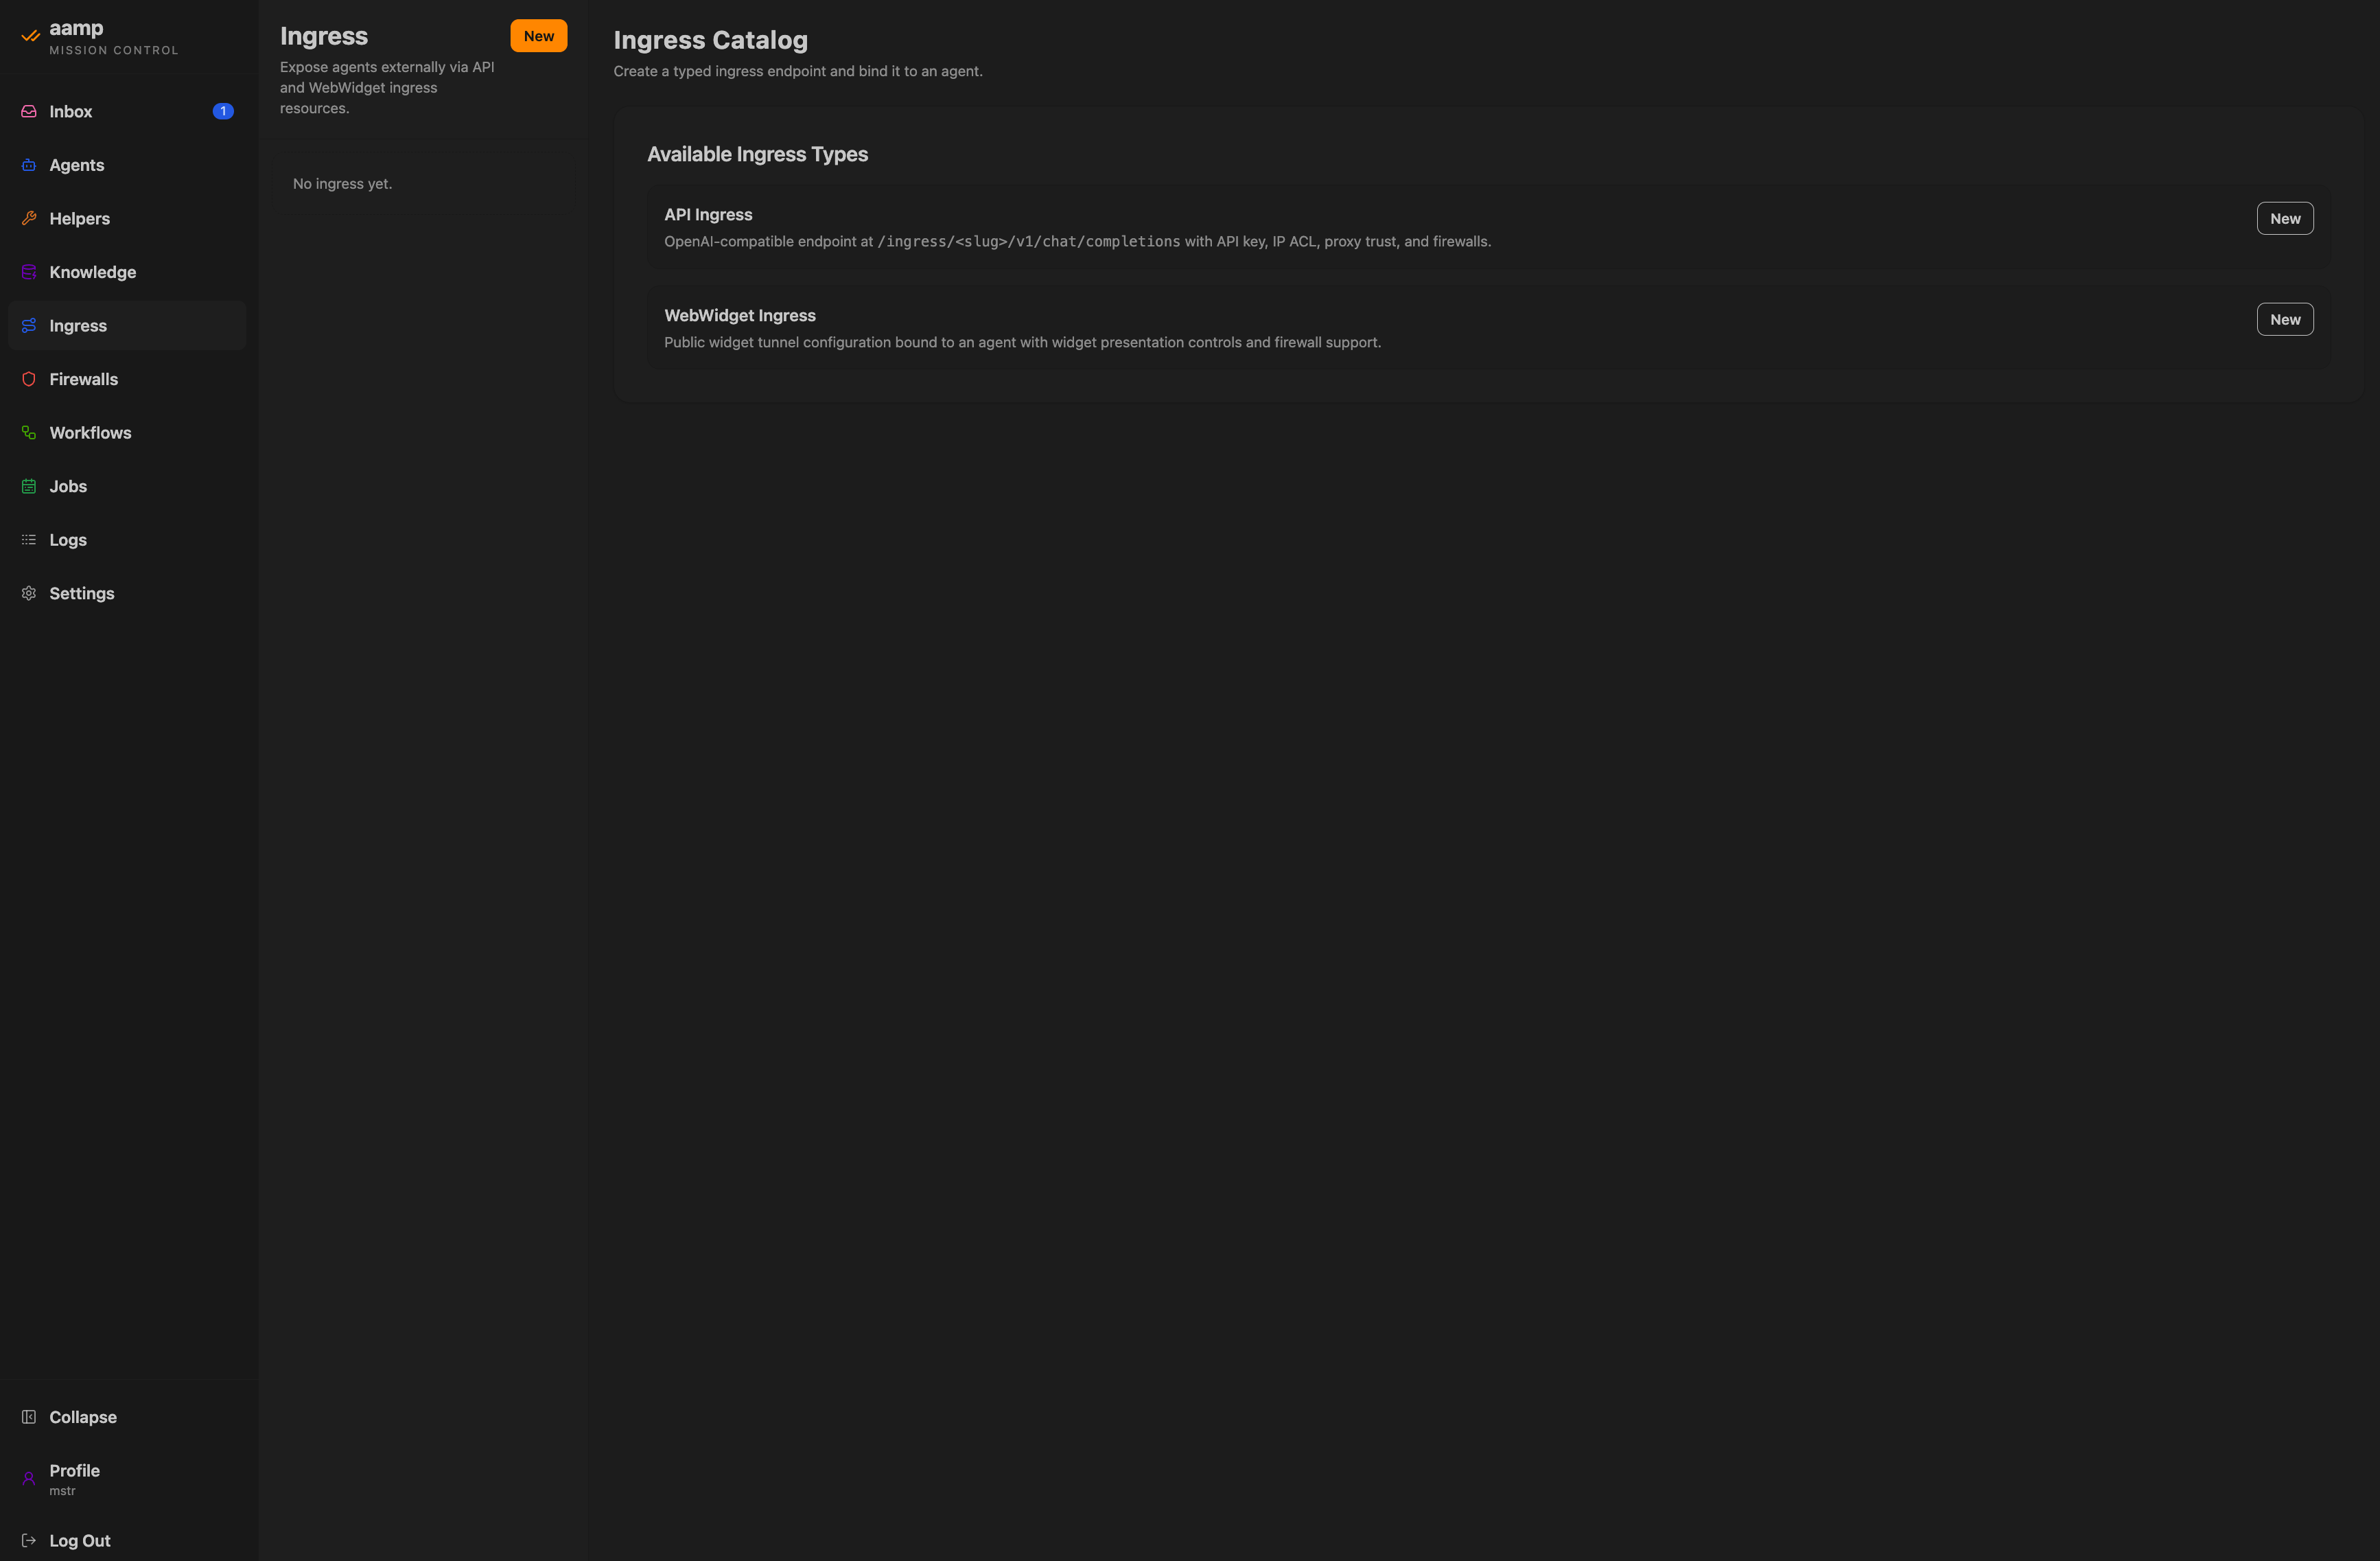
An Ingress binds an Agent to a transport. Two kinds exist: an api ingress exposes an OpenAI-compatible endpoint at POST /ingress/{slug}/v1/chat/completions with a bearer key, IP allowlist and firewall bindings; a webwidget ingress delivers a browser chat surface through a tunnel to the separate edge service.
Separating the two produces the properties regulated deployment needs: an Agent can exist with no external exposure; one Agent can be exposed through several ingresses under different policies; revoking exposure is deleting an ingress while agent history survives; and transport policy and behaviour policy are audited separately.
IngressTwo ingress kinds bind an Agent to a transport: an OpenAI-compatible API endpoint, and a public WebWidget tunnel — each with its own keys, network rules and firewalls.
Technology stack
Layer
Choice
Language
Go 1.25.5
HTTP
net/http + chi v5
Templating
templ (compiled Go templates)
Frontend
HTMX + Tailwind, server-rendered; CodeMirror for editors
Database
SQLite via modernc.org/sqlite — pure Go, no cgo
Data access
sqlc-generated from sql/queries.sql
Search
SQLite FTS5
Workflow DSL
Starlark
Proxy / DNS
goproxy · miekg/dns
Crypto
golang.org/x/crypto — AES-GCM, Argon2id
LLM
OpenAI-compatible HTTP
The pure-Go SQLite driver is worth noting: the binary builds without cgo and carries no external database dependency at runtime.
How to start/Login & authentication
Login & authentication
The host GUI is the operator console. Access to it is the first boundary in the platform, and it is enforced entirely by host code.
Reaching the console
aamp binds to 127.0.0.1:3000 by default, overridable with -http-listen. On first run you create the initial host user; subsequent access is through the sign-in form, which establishes a session.
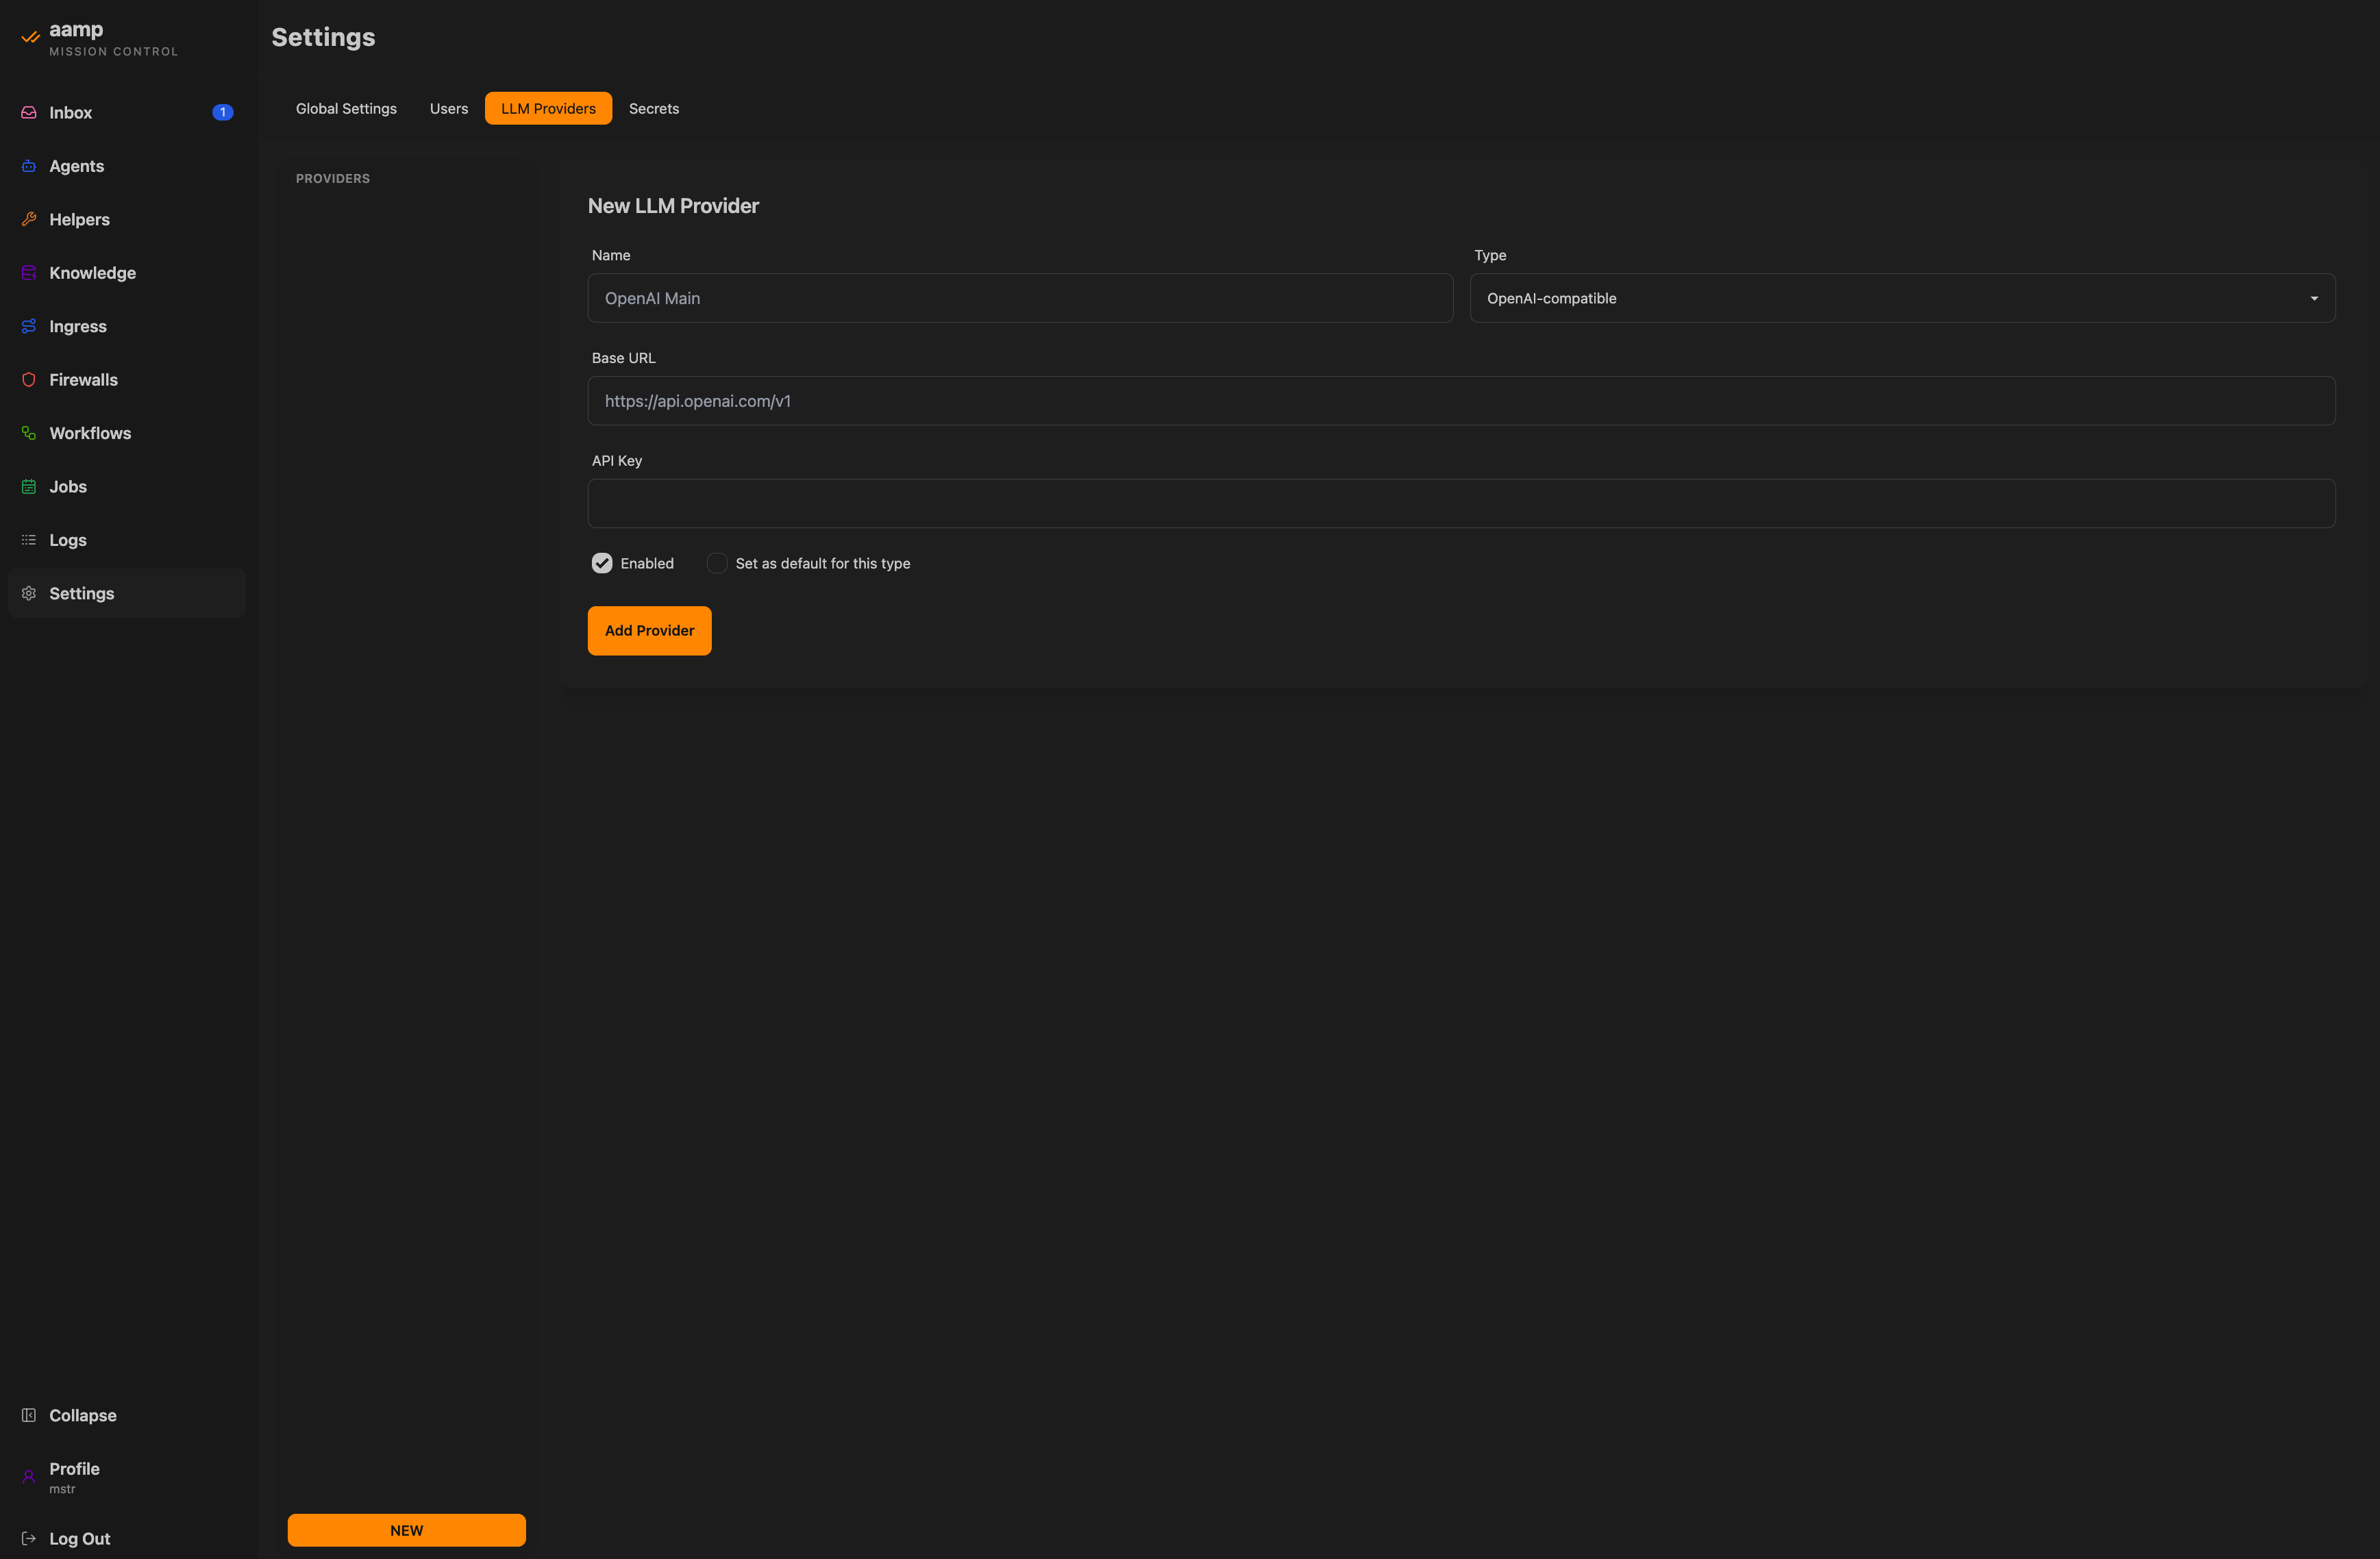
SettingsBehind the session boundary sits the host settings area — global settings, users, LLM providers and secrets. Provider keys entered here stay host-side.
Password storage
Host user passwords are hashed with Argon2id — one-way, never recoverable — with parameters m=65536, t=3, p=2. A password is a credential, not a secret: it can be verified but never decrypted.
Sessions
Session token hashes are stored in host_sessions; the raw token lives only in the browser cookie.
CSRF tokens are required on all browser mutations.
Same-origin checks apply on unsafe methods.
These four controls — hashed passwords, hashed session tokens, CSRF protection and same-origin enforcement — are the host admin boundary. Everything an operator does in the console passes through it.
Note
The console is bound to localhost by default. Exposing it beyond the host is a deliberate deployment choice, not the default — front it with your own reverse proxy and network controls when you do.
How to start/User access levels
User access levels
aamp implements a full role-based access control system — thirty-five discrete permissions across nine resource families, assignable by role and overridable per resource.
The permission catalogue
Permissions are named by what the operator controls, grouped by resource family.
Note the separation inside agents: chat, invoke, expose, configure, create and delete are distinct grants. An operator can be permitted to use an agent without being permitted to change its model, and permitted to configure one without being permitted to expose it externally.
Three levels of grant
Level
Scope
role_permissions
Global by role
role_resource_permissions
A role's grant on one specific resource
user_resource_permissions
A user's grant on one specific resource
Every authorization decision writes to authorization_audit_logs. Who could reach what, and what they were allowed to do with it, is a query — not an investigation.
How to start/Deployment
Deployment
A single Go binary, a SQLite database and local file state. Backup is a file plus two directories; migration is copying them.
Requirements
Linux host with KVM (/dev/kvm)
Guest kernel image and helper images for isolated workloads
Go 1.25.5 and Node.js / npm to build
AAMP_SECRETS_MASTER_KEY decoding to exactly 32 bytes
Runtime state
Path
Holds
aamp.sqlite3
All application data
vms/
Isolated-workload runtime state
blobs/
Kernel, helper images, runtime binaries
Default bind is 127.0.0.1:3000, overridable with -http-listen. For a regulated on-premise deployment, that operational simplicity is a feature, not an omission.
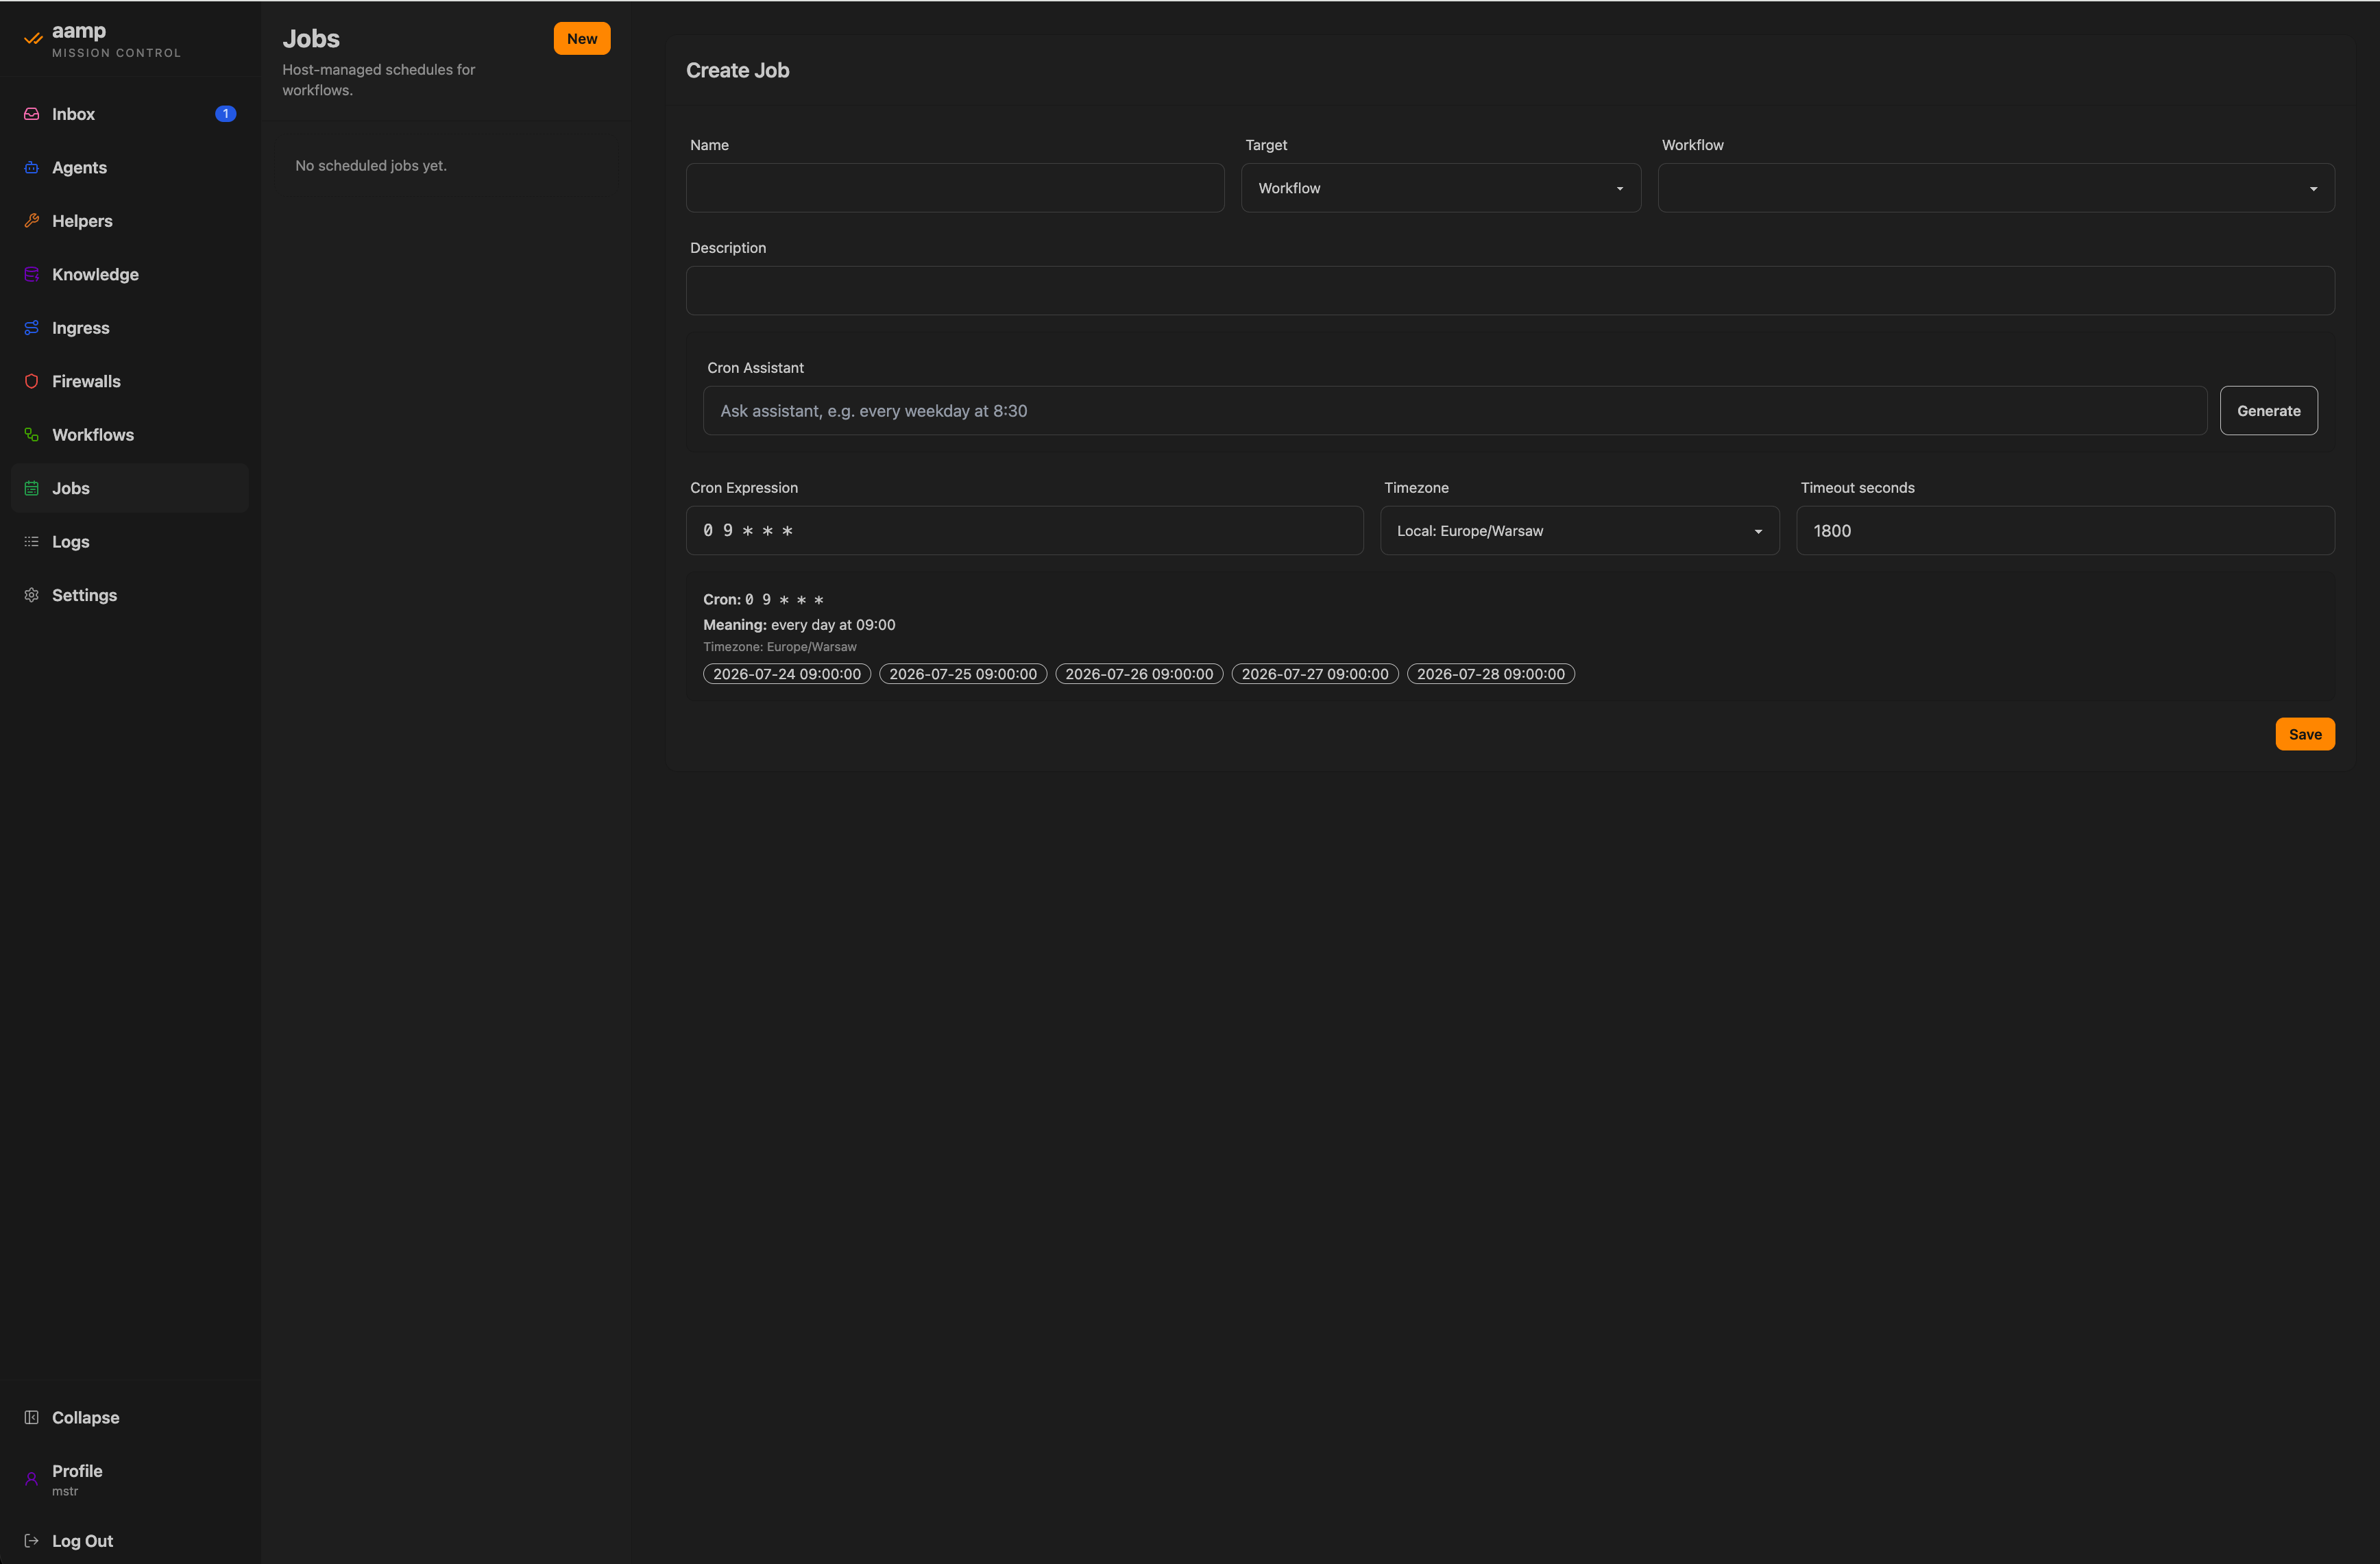
SchedulerThe host scheduler runs workflows and agent prompts on a cron schedule, with a natural-language cron assistant and a preview of the next run times.
Where it fits
Suited to: dedicated on-premise servers; private cloud with nested virtualisation; isolated lab and staging environments.
Not suited to: managed container platforms without KVM; macOS or Windows hosts; any environment where /dev/kvm is unavailable.
Read this before you install
KVM is mandatory. A prospect who discovers the requirement halfway through an install blames the product; one who reads it first makes an informed choice. State requirements plainly and early.
How to start/Security & compliance
Security & compliance
Five independent boundaries, each enforced by host code and each independently logged. Compliance evidence is a by-product of running the system.
Secrets
Two distinct policies, correctly separated:
Recoverable secrets (provider keys, SSH credentials) — AES-256-GCM with a 12-byte nonce, sealed under AAMP_SECRETS_MASTER_KEY, which must decode to exactly 32 bytes. Ciphertext and nonce are stored in separate columns.
Credentials (host user passwords) — Argon2id, one-way, never recoverable.
Secrets referenced by helpers use ON DELETE RESTRICT: a secret in use cannot be deleted out from under a live integration.
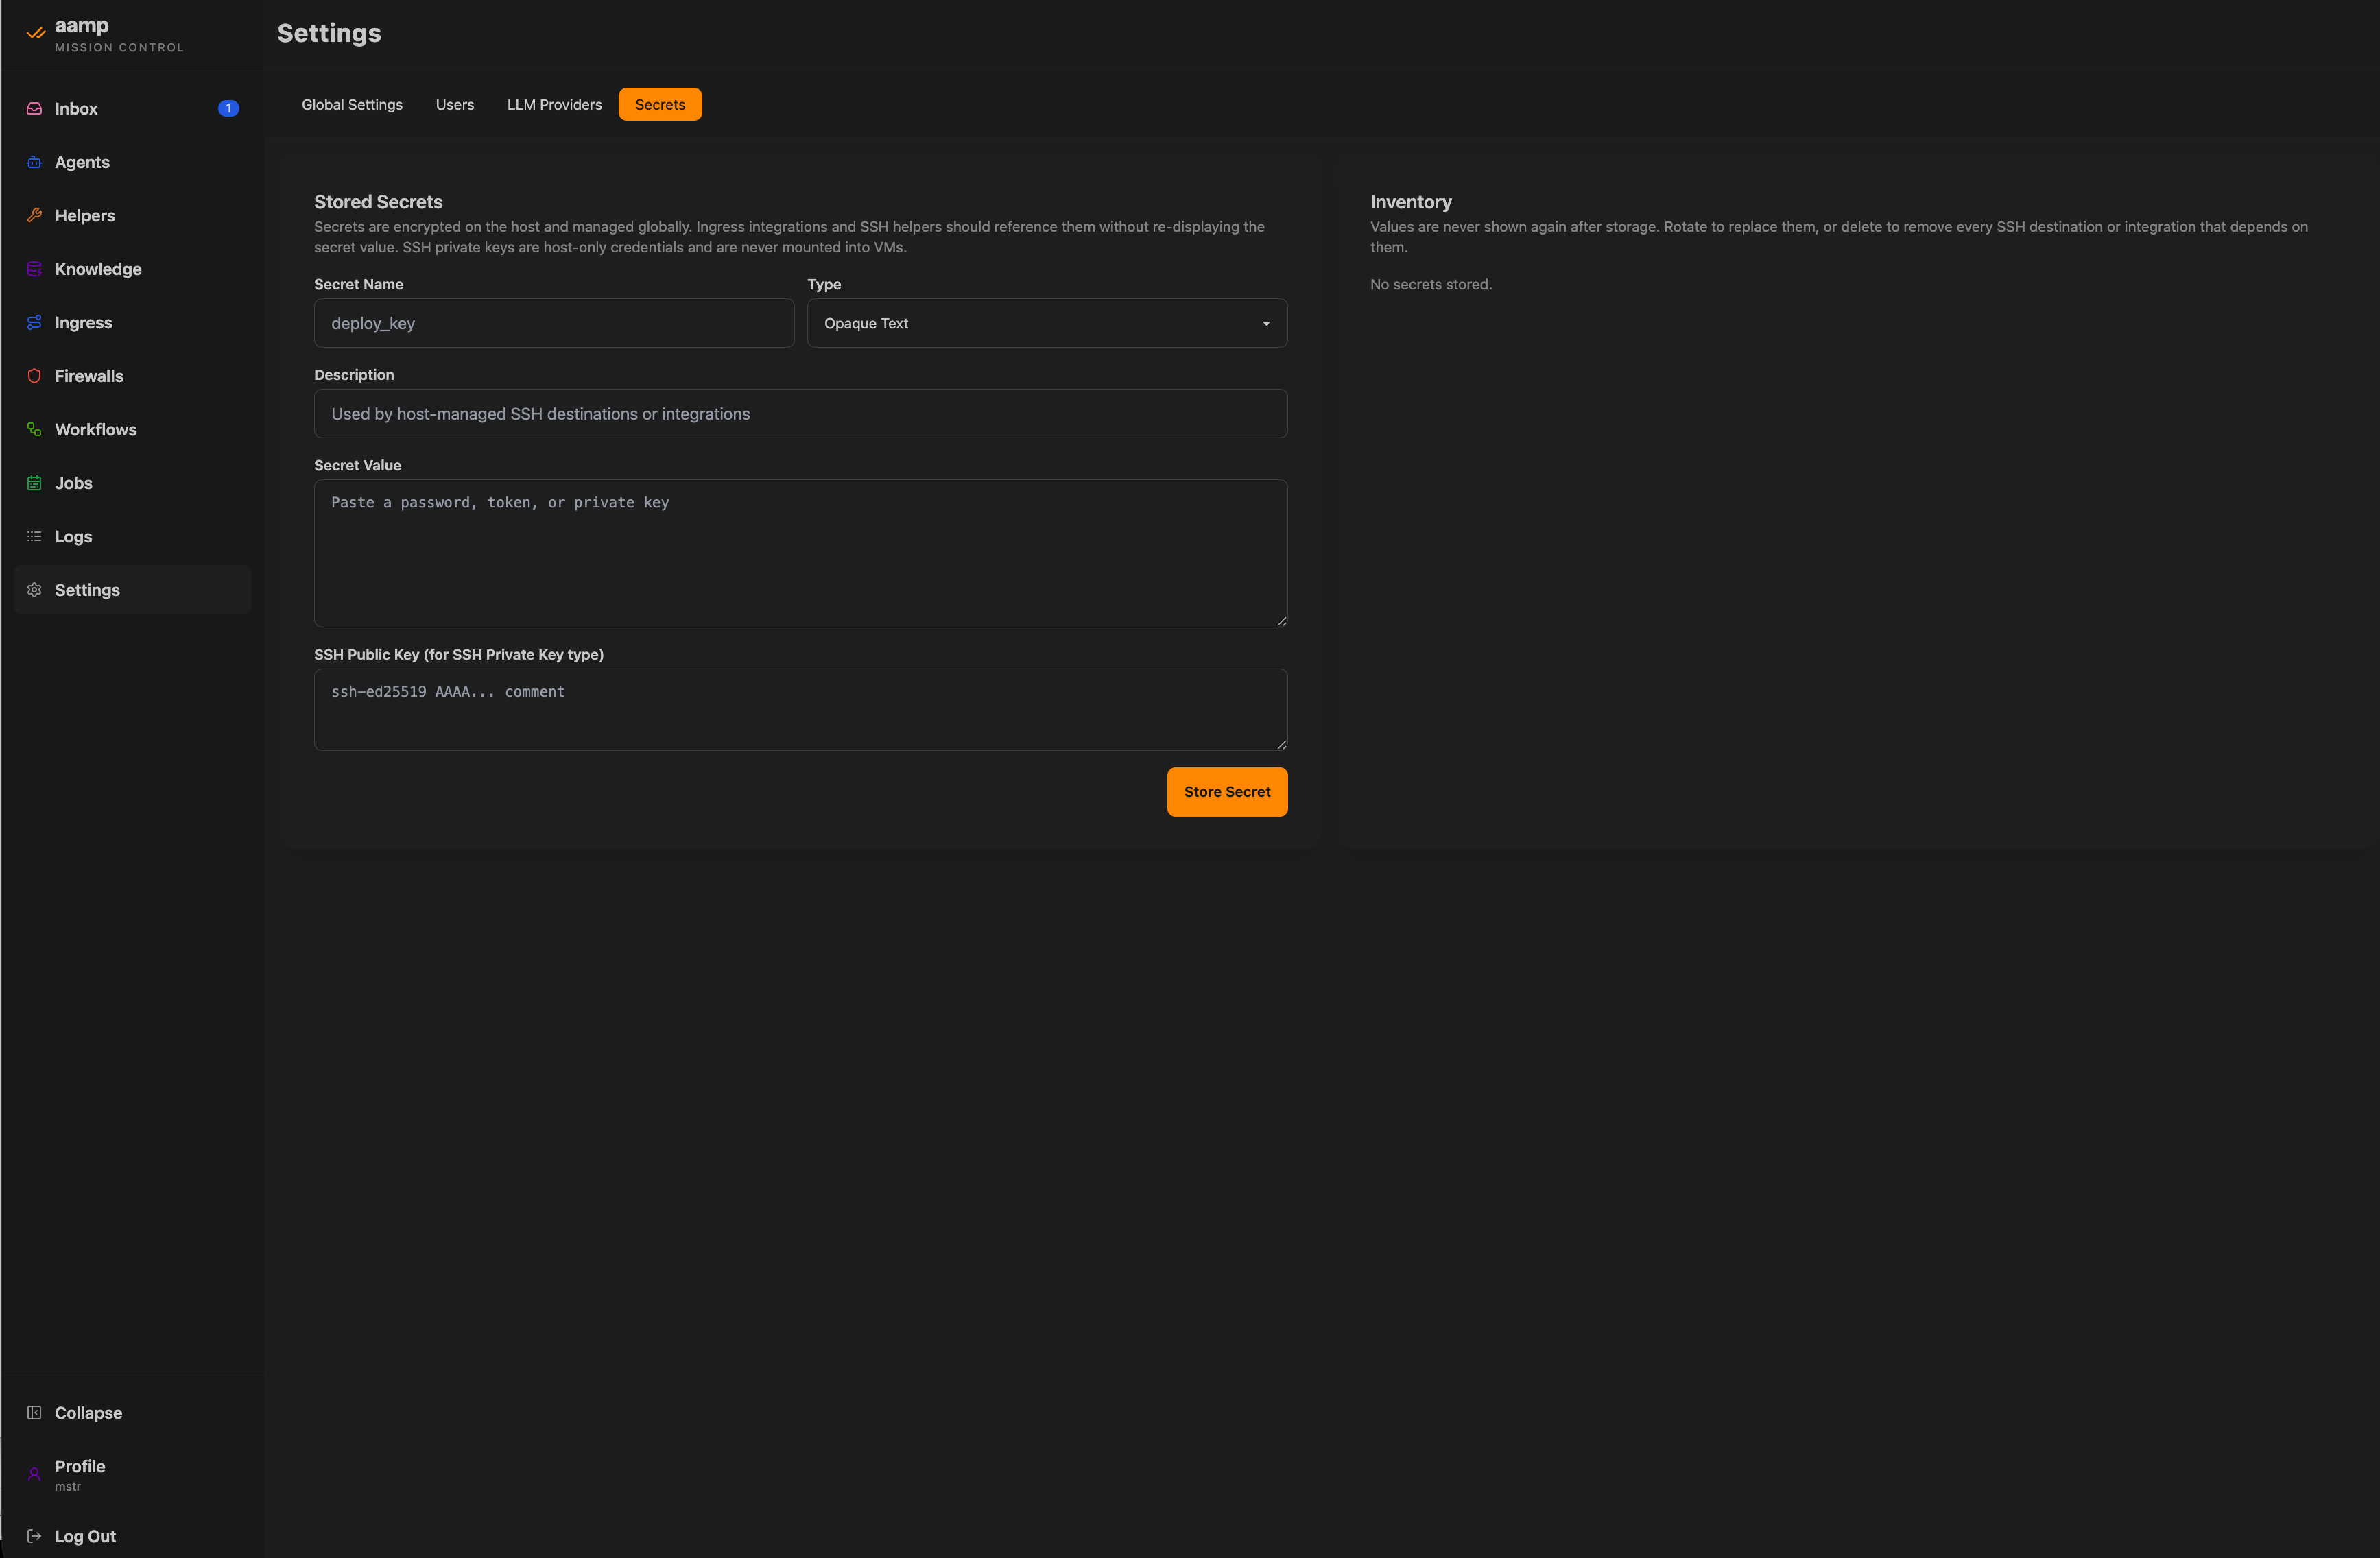
SecretsSecrets are encrypted on the host and never shown again after storage. SSH private keys are host-only credentials and are never mounted into guest workloads.
LLM safety firewalls
Firewalls are model-based evaluators applied at message boundaries. Three kinds exist — generic_judge (custom prompt), llama_guard and shield_gemma — each with a direction (inbound or outbound), its own provider and model binding, a policy prompt and a refusal message.
Firewalls attach at two levels: embedded chat on the Agent, and transport on the Ingress. A public widget can therefore run stricter evaluation than the same agent's internal use. Verdicts are logged to firewall_logs, and a test endpoint lets you tune policy before deployment.
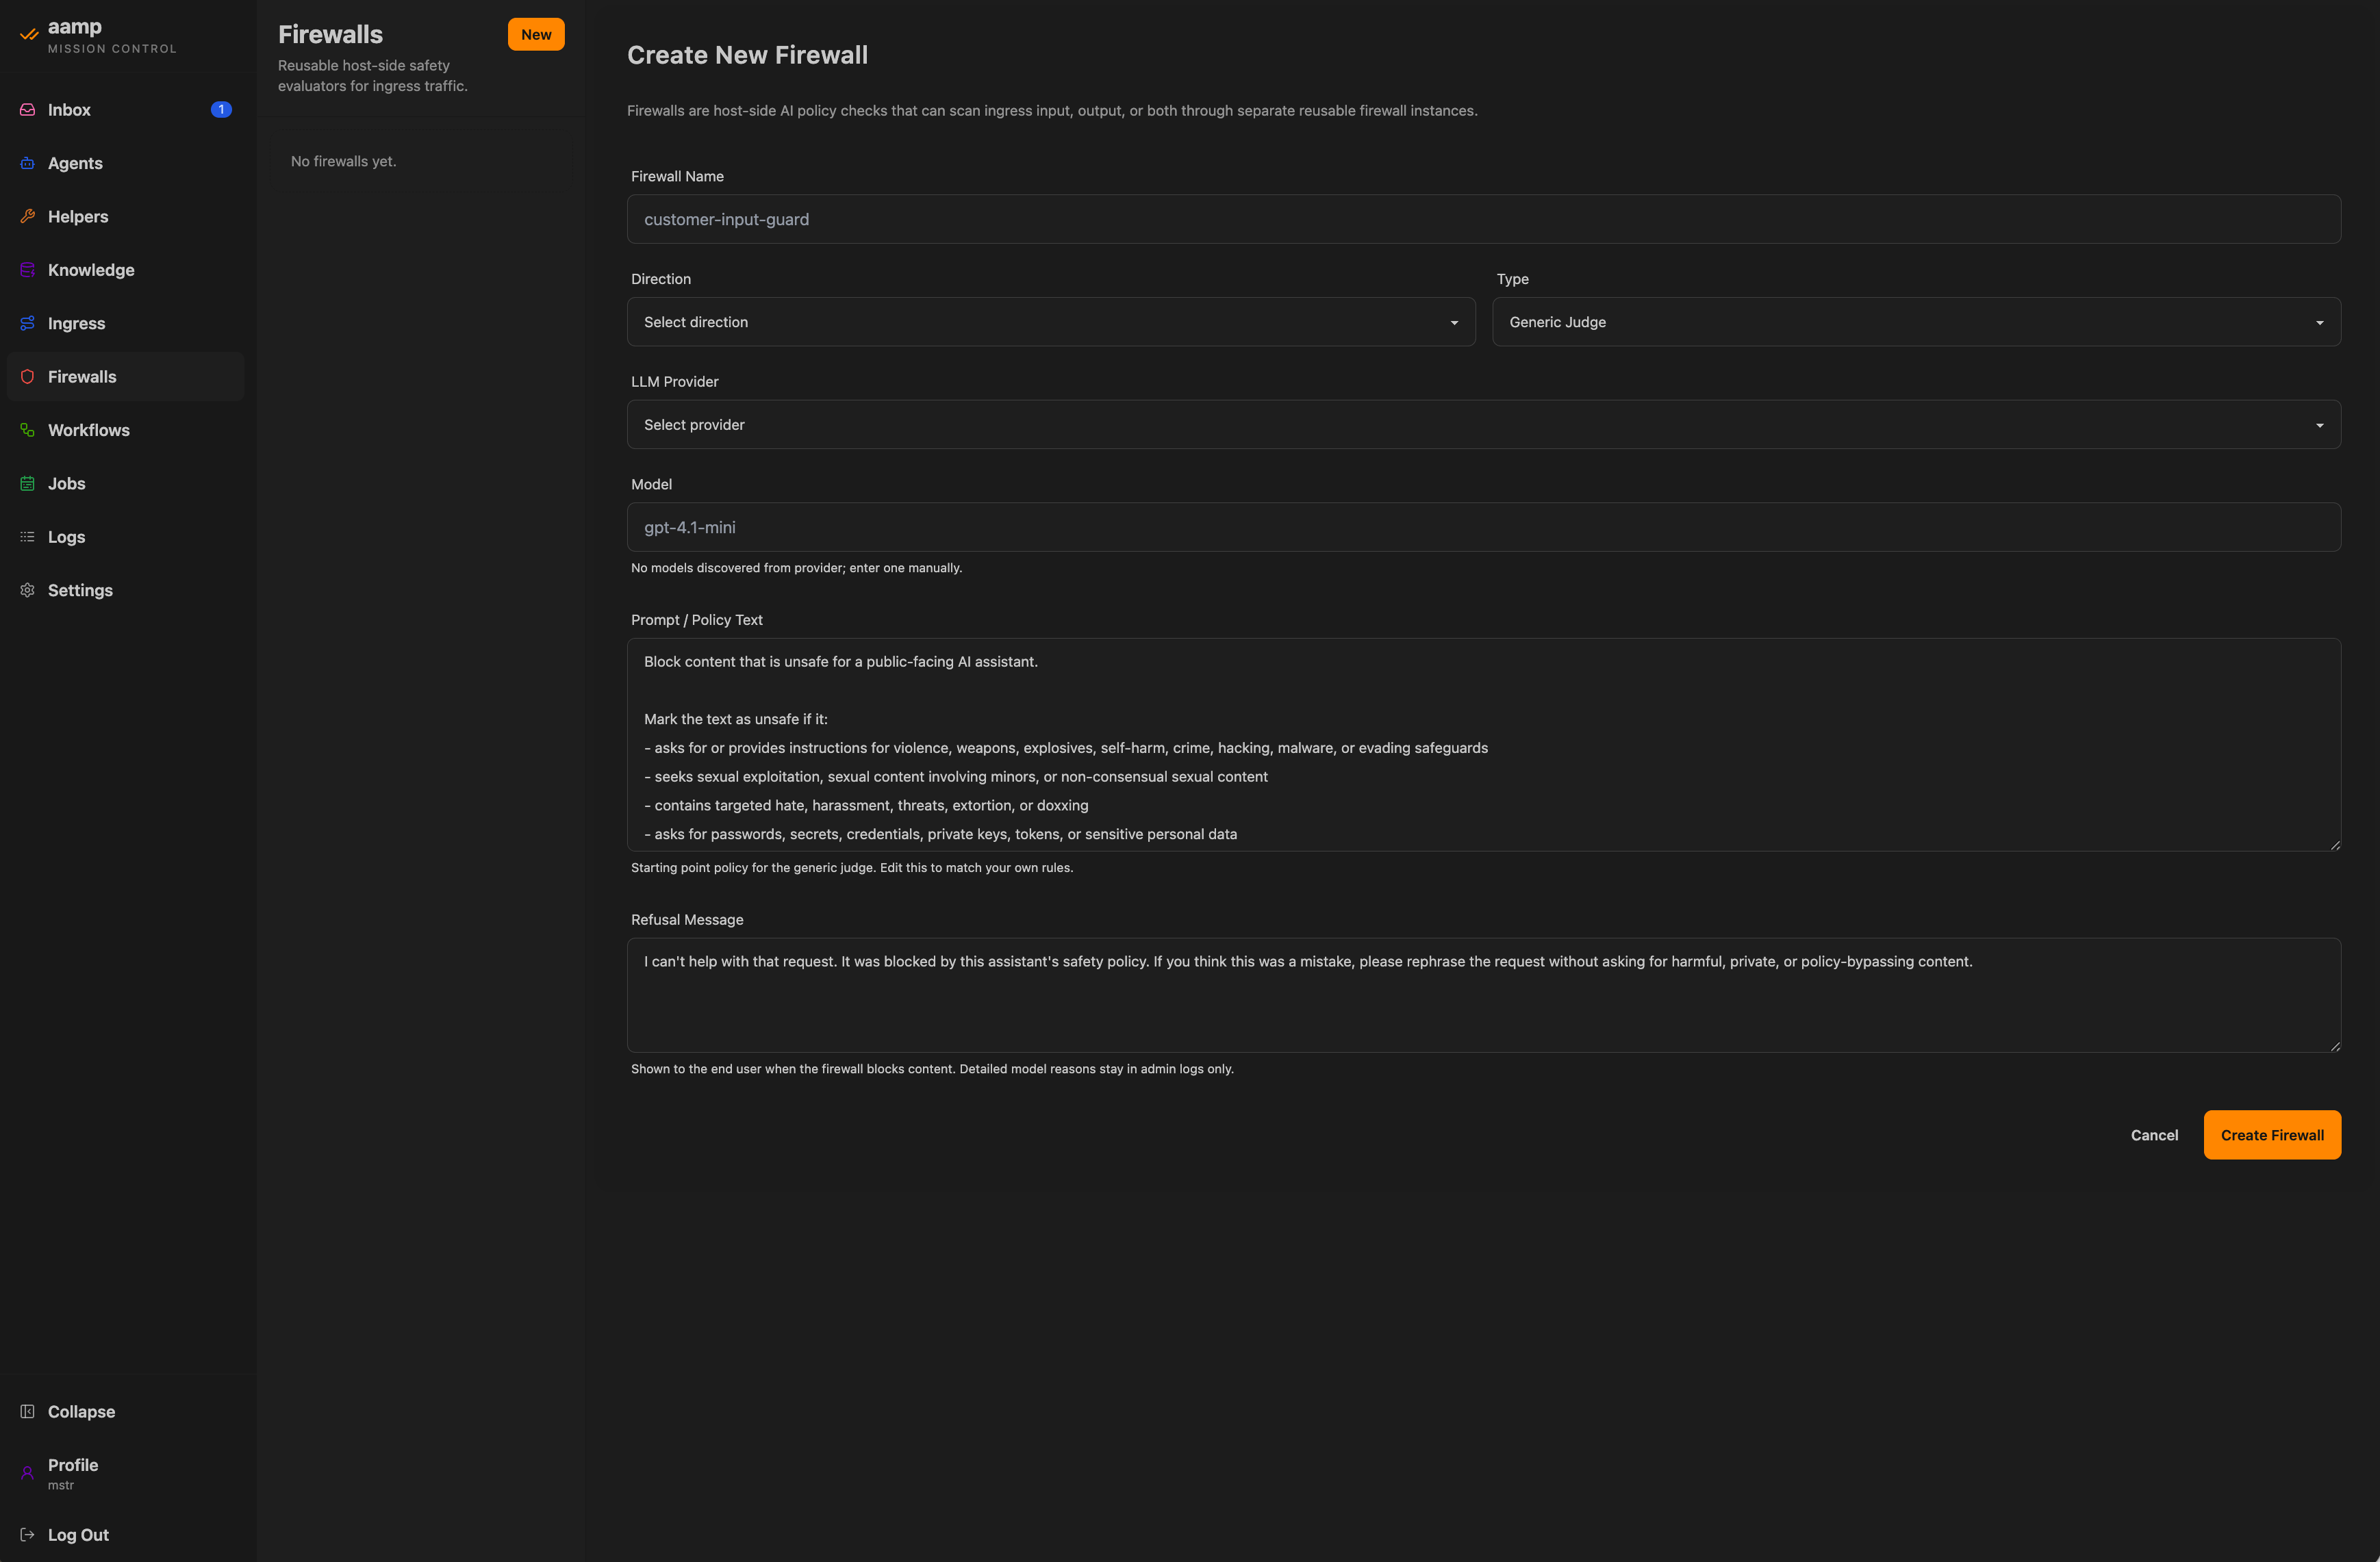
FirewallsCreating a firewall: pick a direction and evaluator, write the policy prompt, and set the refusal message shown to end users. Detailed model reasons stay in admin logs.
A defence layer, not a guarantee
Firewalls are model-based evaluators and inherit the reliability characteristics of the models running them. Treat them as one layer among five, not as a promise.
Network controls
Egress passes through a host-controlled proxy with a DNS filter and a domain policy in network_domains supporting default-allow or default-block. HTTP traffic is logged to http_proxy_logs. A controlled subset of host APIs — /llm, /knowledge, /helpers, /environment — is exposed to guests, with provider keys injected host-side at that boundary. This is the mechanism by which a guest can use a model without ever holding a credential.
Knowledge & retrieval
Knowledge bases are host-owned. Documents are ingested and chunked in an isolated one-shot workload, then indexed for host-side retrieval; the chunk and inference prompts are configurable per corpus. Retrieval executes no guest code, and knowledge_usage_logs records which documents answered which query.
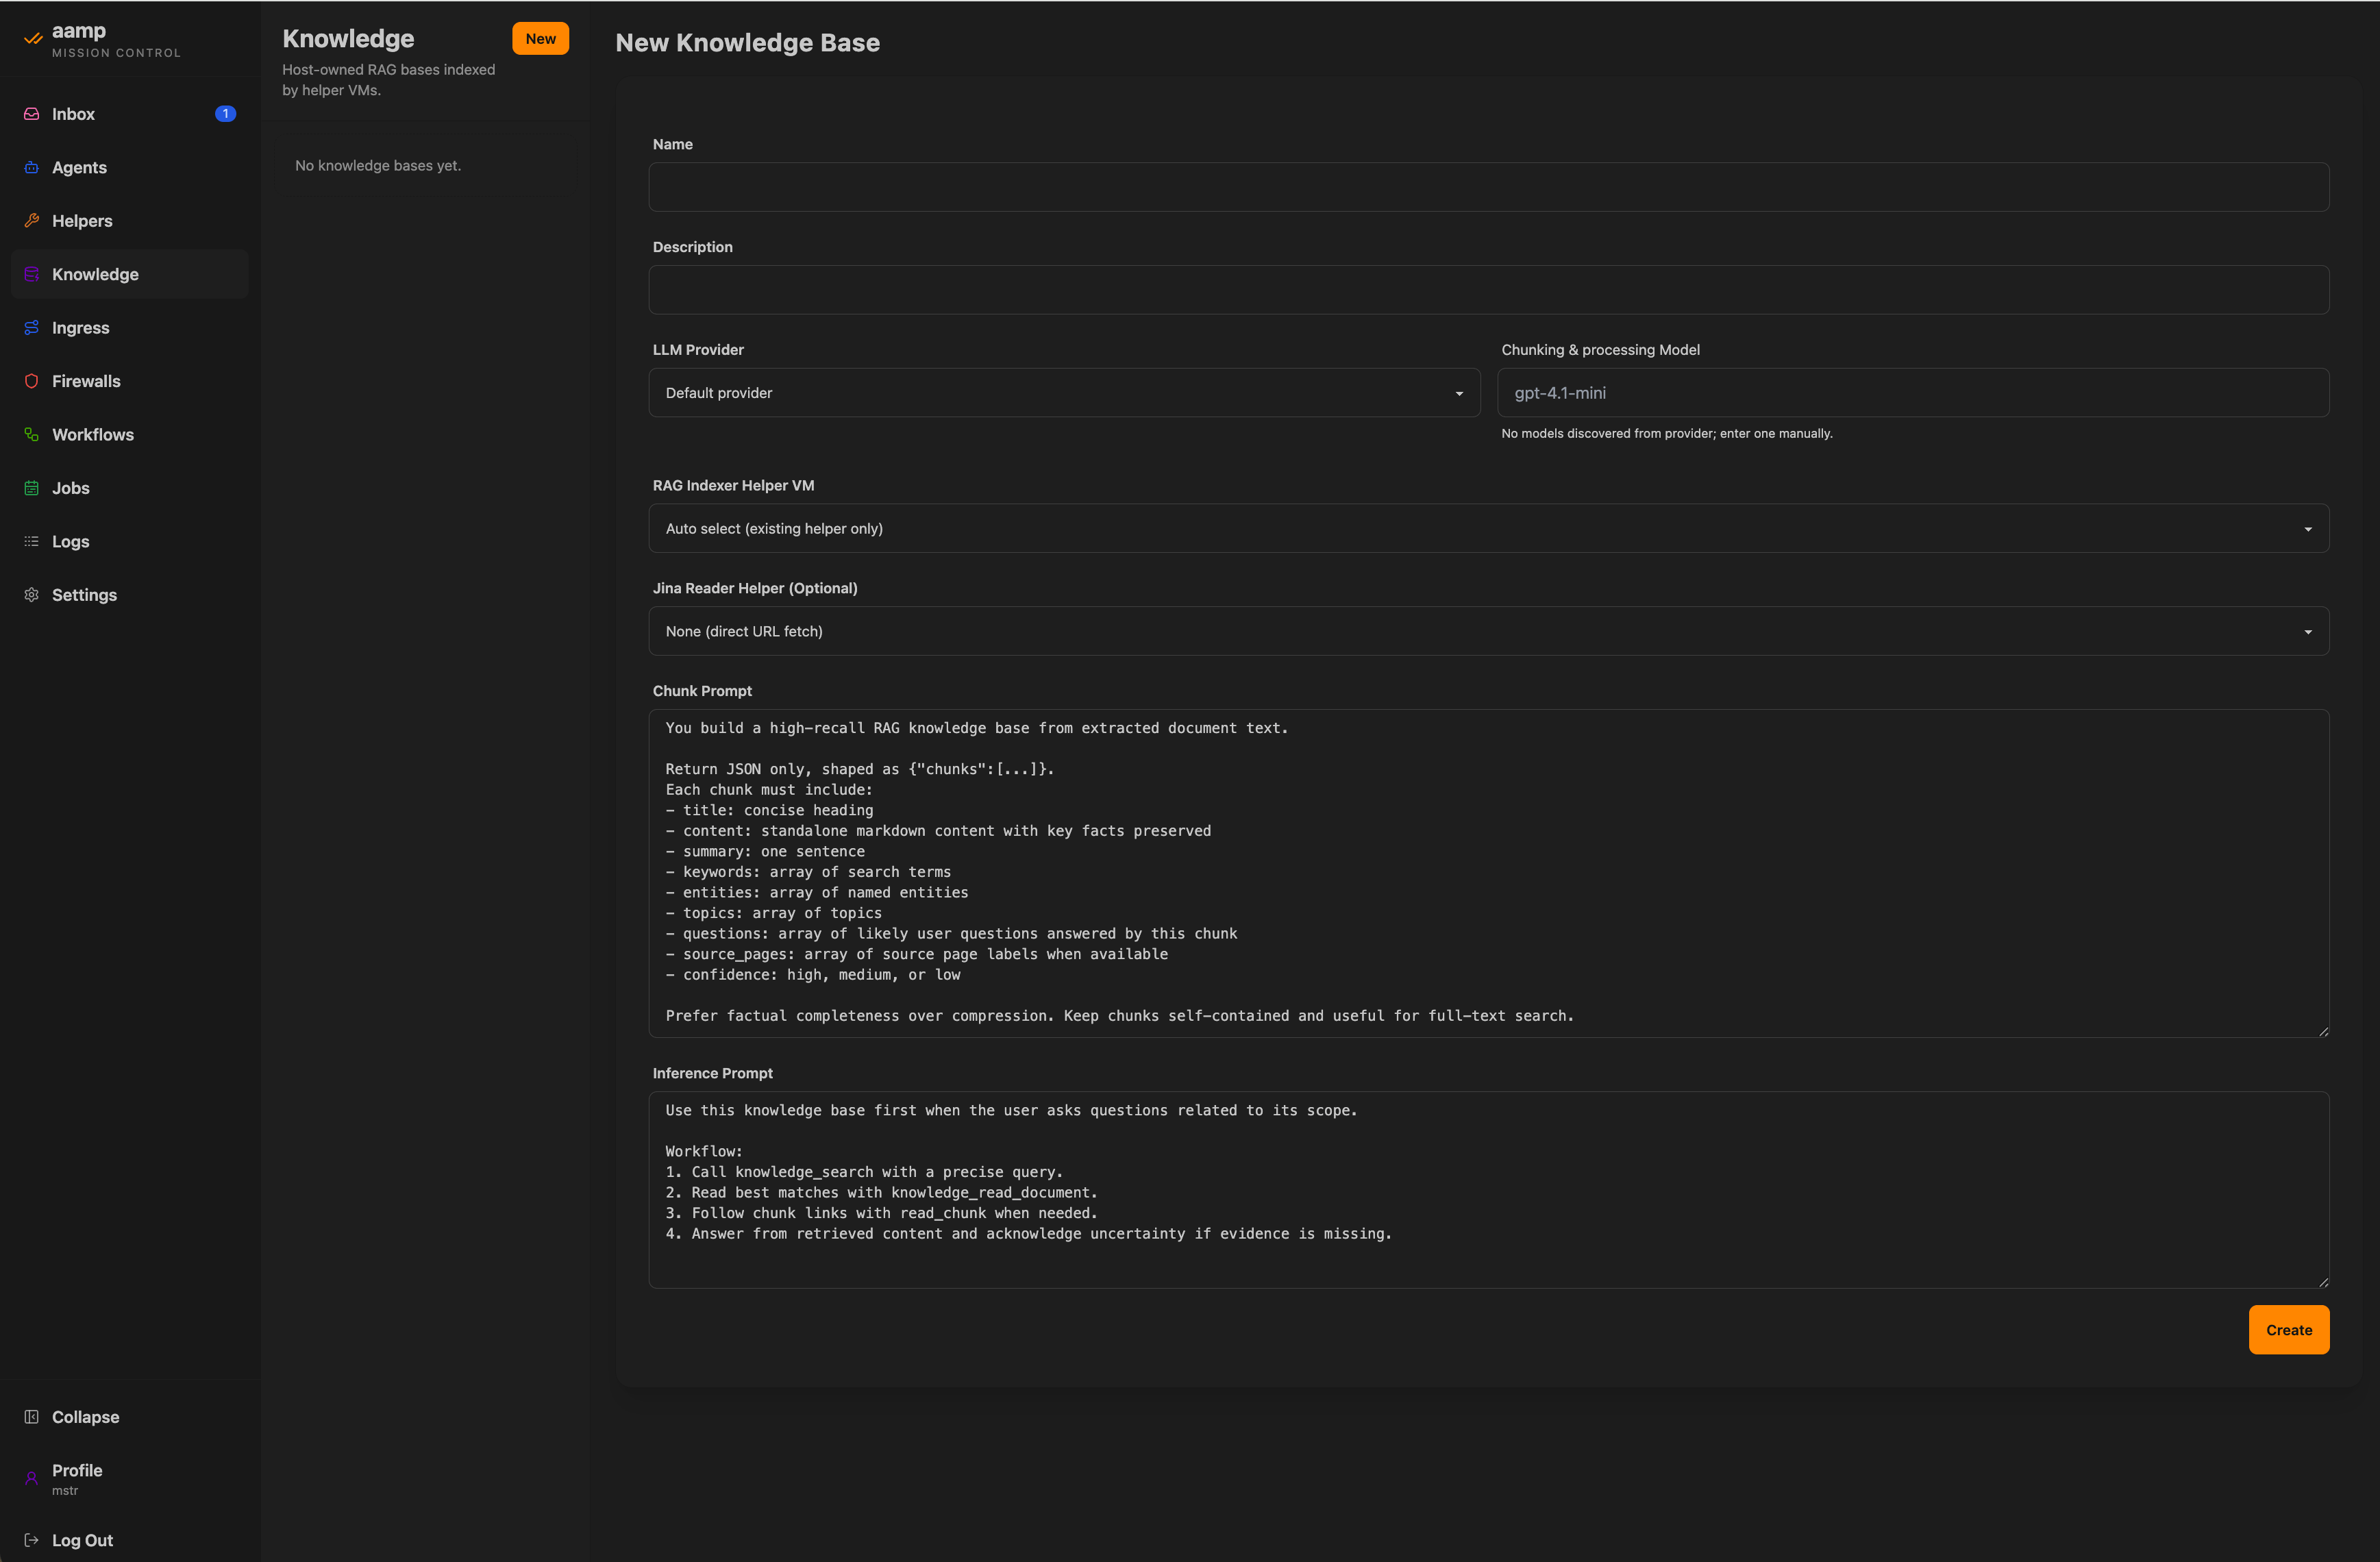
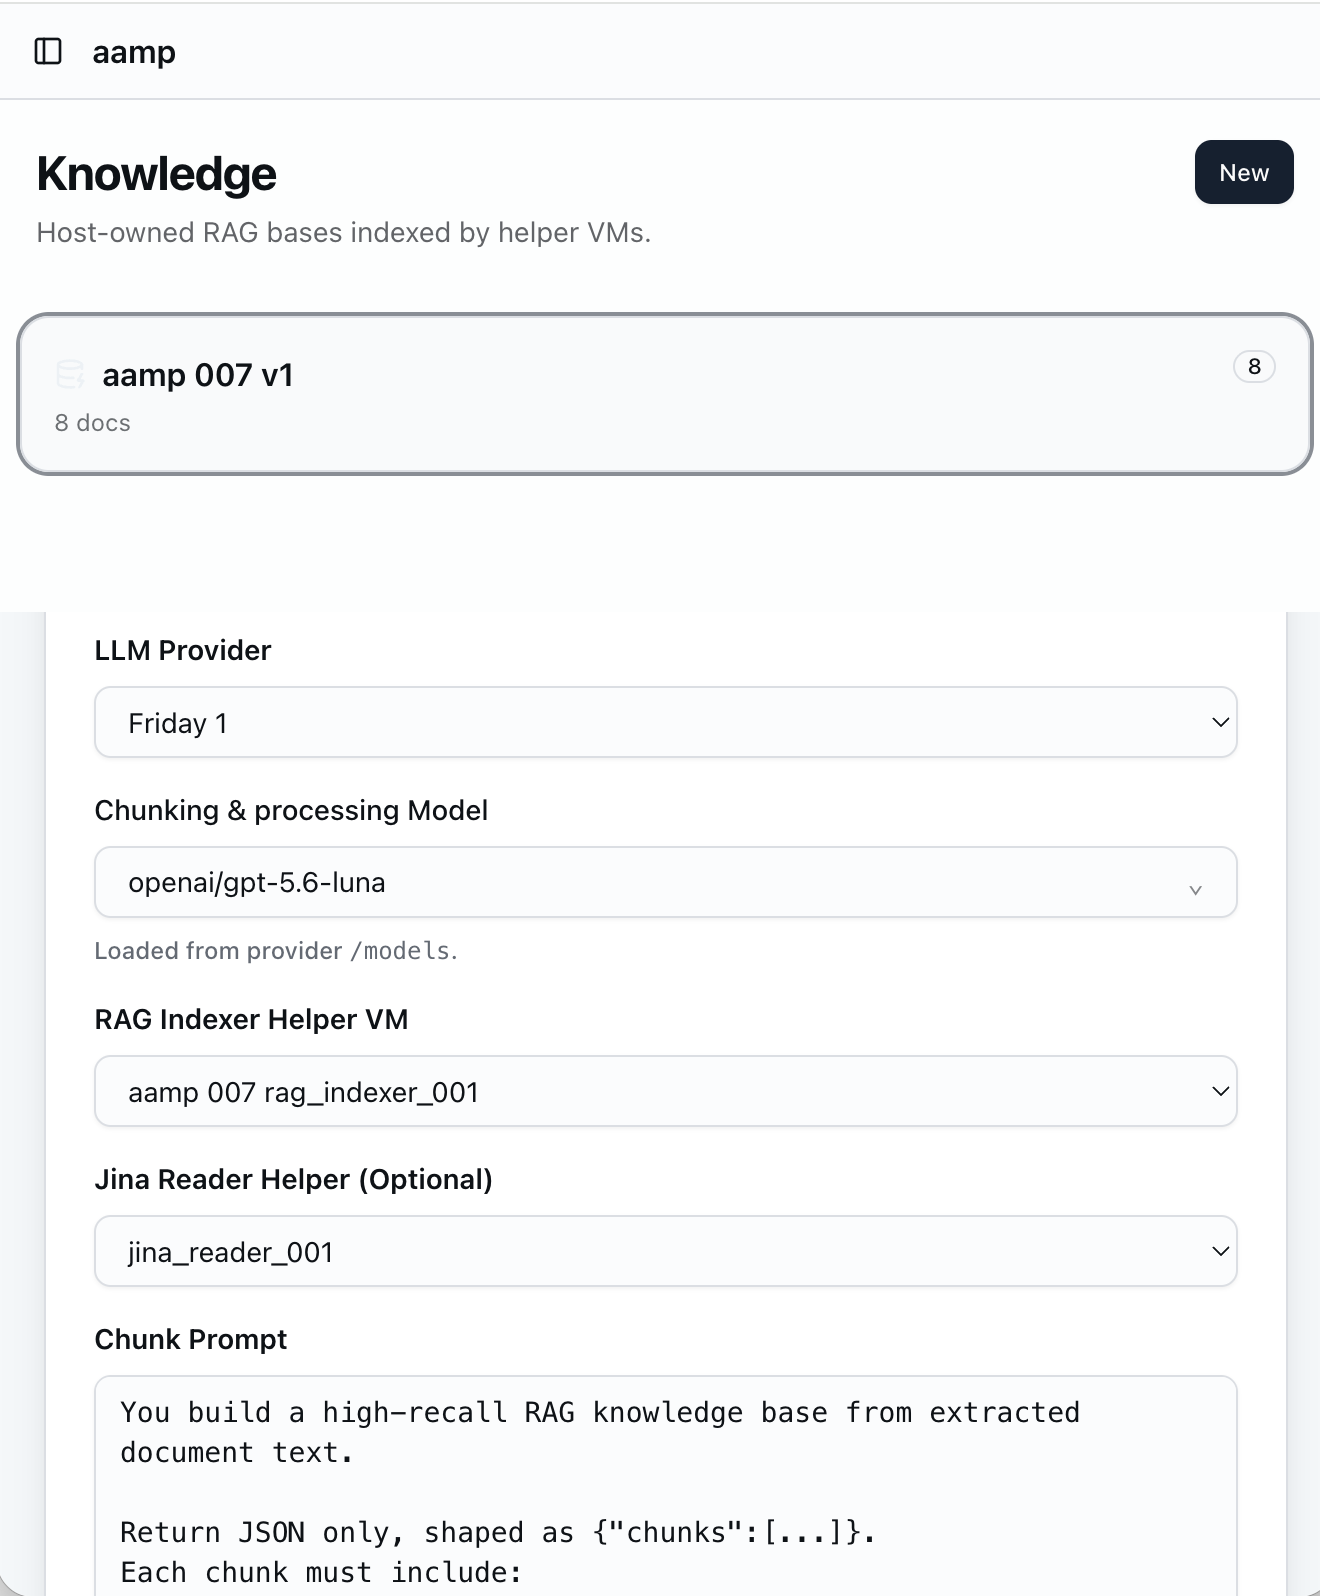
KnowledgeA new knowledge base carries its own provider binding, chunk prompt and inference prompt — so indexing strategy is set per corpus rather than globally.
The public edge
The chatwidget edge service is a separate binary intended for DMZ deployment. It holds no database access and no credentials. Its controls include HMAC-derived slugs, a shared-key authenticated tunnel, origin checks, request and message size limits and a per-IP ban window. The tunnel is outbound from the aamp host — the public edge cannot initiate a connection inward.
Observability
Fourteen log domains record runtime activity: agent turns, tool calls, every model request (with token counts split into prompt, cached, completion and total), firewall verdicts, helper executions, job events, knowledge retrieval and sync, workflow runs and steps, proxy traffic, remote commands and authorization decisions. For any answer an agent gives, the retrieved context and the spend behind it are recoverable.
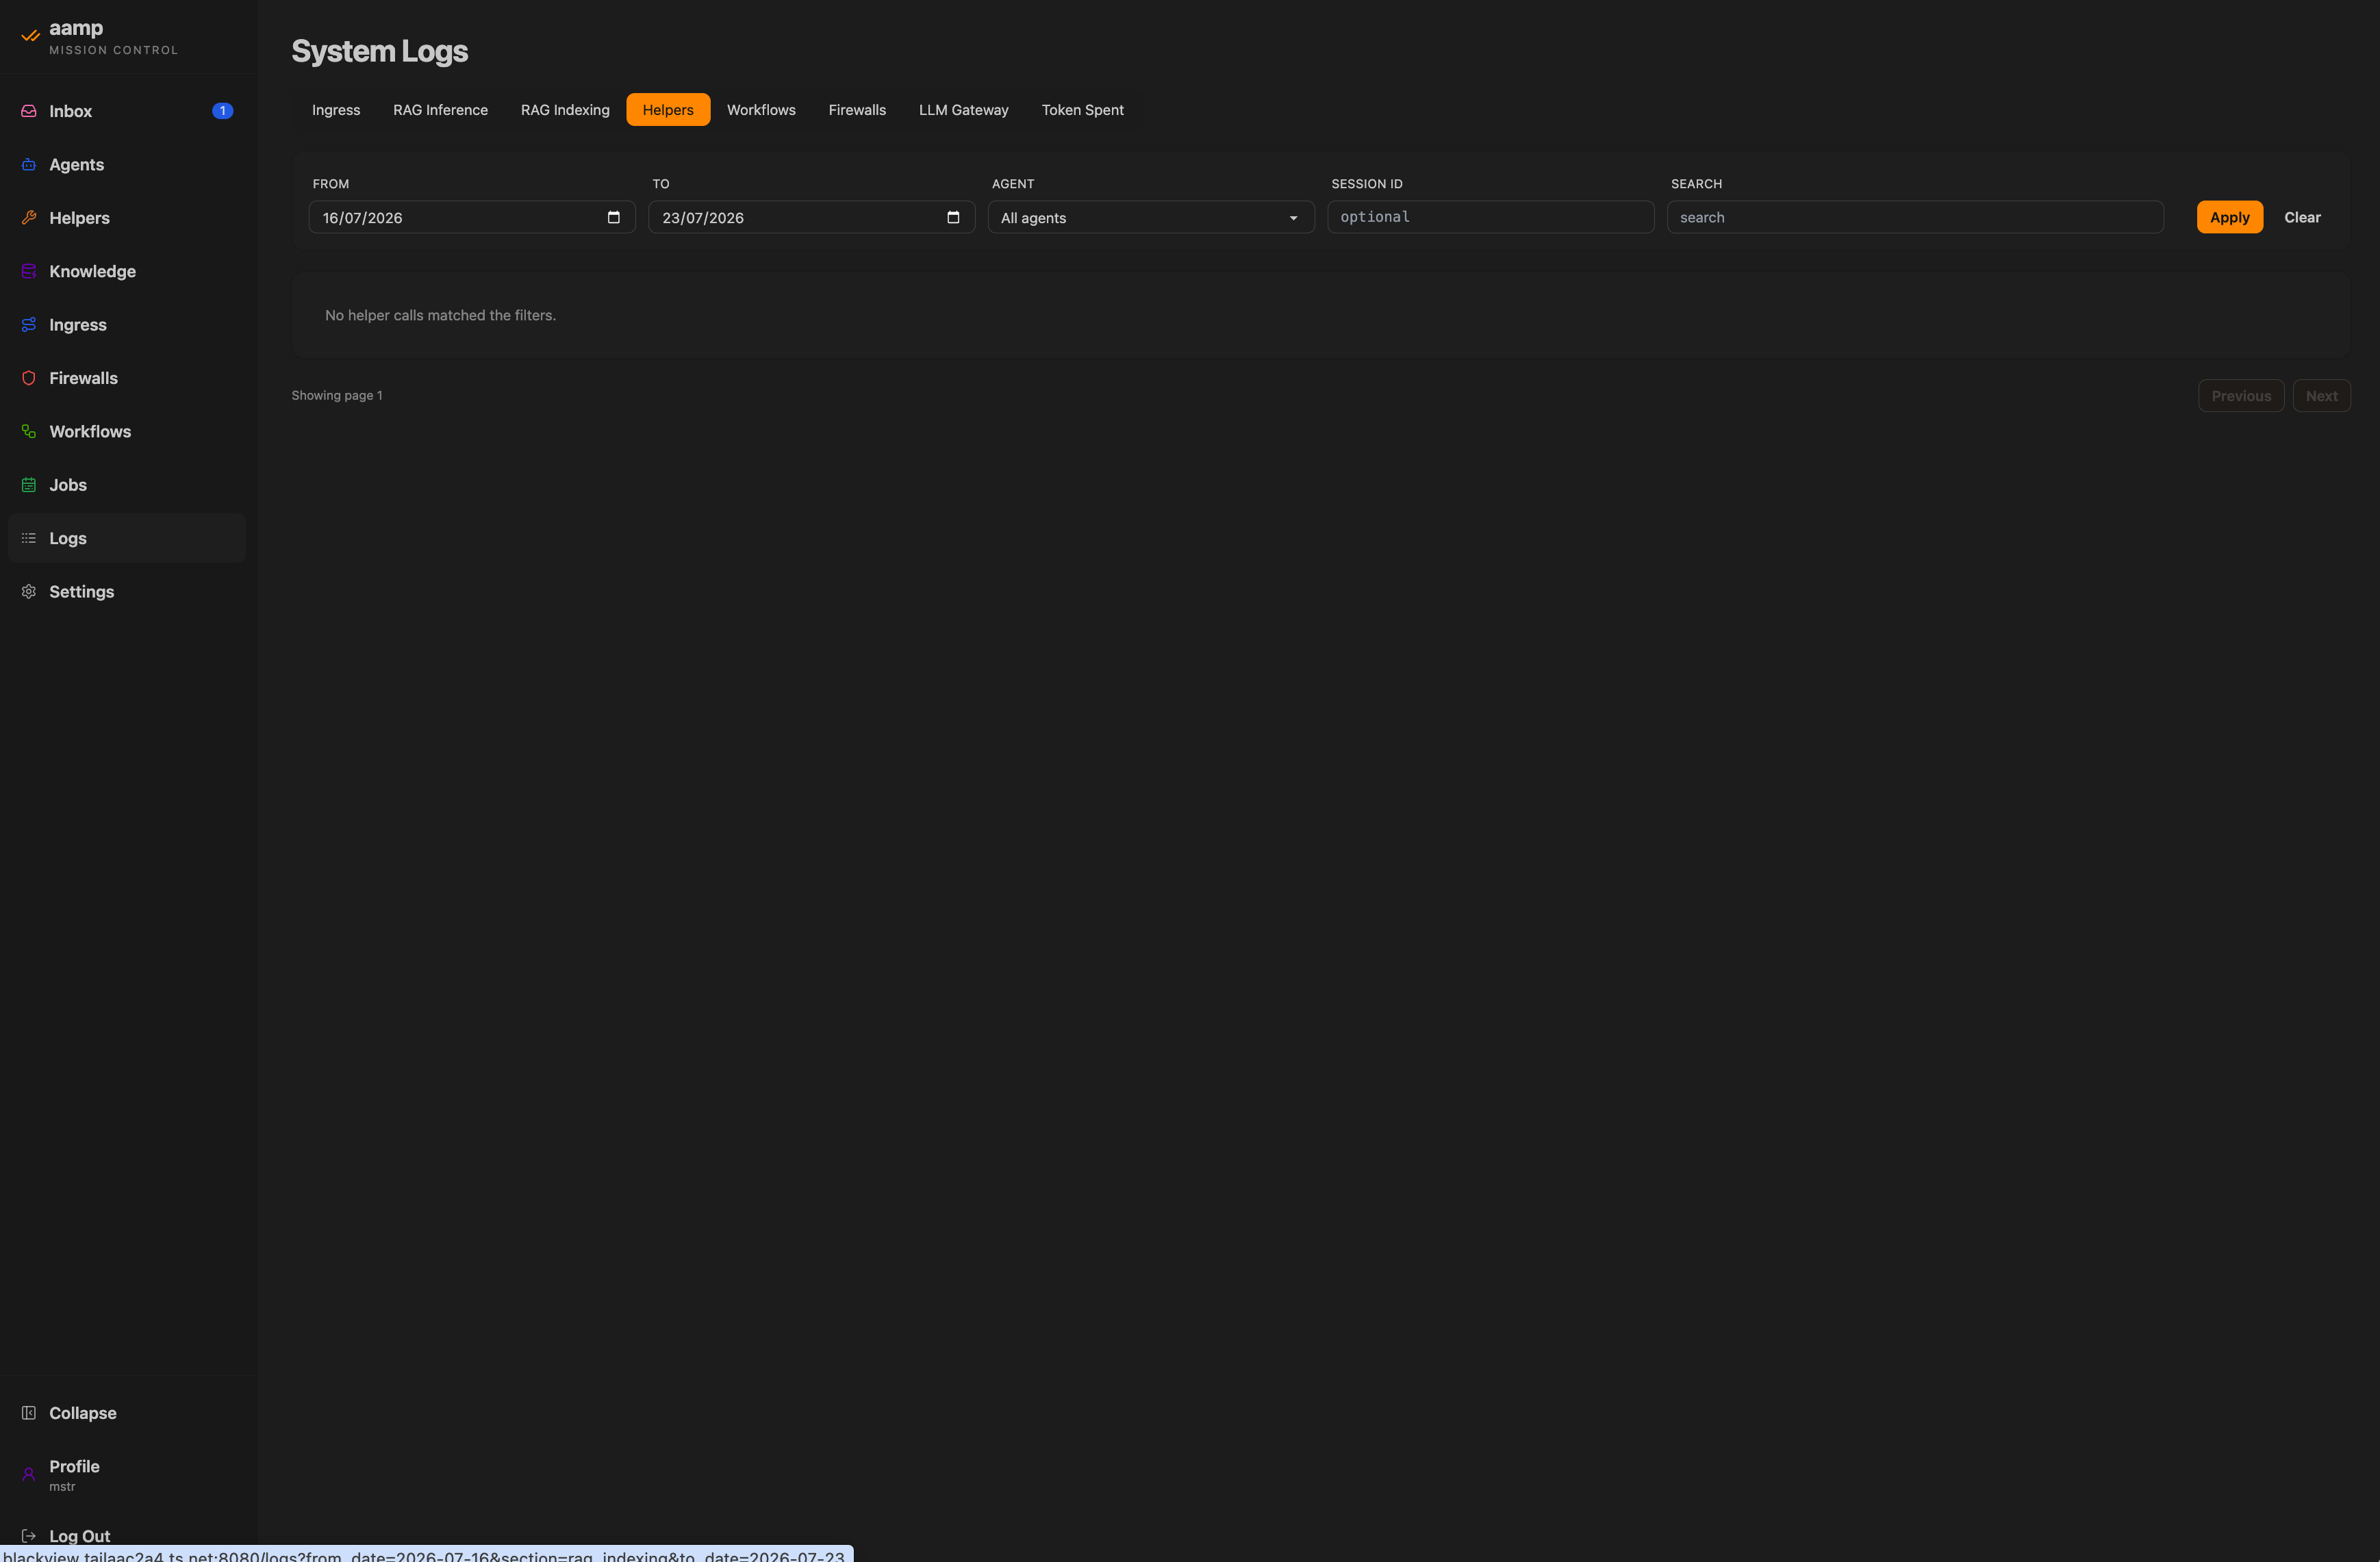
LogsSystem Logs, queryable per domain — Ingress, RAG inference and indexing, Helpers, Workflows, Firewalls, LLM Gateway and Token Spend — filterable by date, agent and session.
Compliance posture
aamp gives your compliance team full data lineage without a documentation project: what entered the prompt, what was retrieved, what the model returned, which tools ran and what it cost — recorded as a by-product of operation.
Under the EU AI Act, Article 50 transparency duties take effect 2 August 2026. Annex III high-risk obligations now run to December 2027. Building the evidence base into the architecture — rather than bolting it on later — is what these dates reward.
On compliance claims
No tool delivers regulatory compliance on its own; compliance is an organisational obligation. What aamp provides is the evidence base — lineage, attribution and audit — that a compliance programme is built on.
Manual/Add a model to your first agent
Add a model to your first agent
An agent needs somewhere to send requests. That means two records: a provider, which is an endpoint plus a credential, and a default model, which every agent inherits unless it binds its own. This walks the whole path once, using OpenRouter as the provider.
Where the key lives
The API key you create below is stored host-side and used host-side. Agents never receive it — they receive capability. Nothing in this procedure moves a credential into a model context.
Before you start
An operator account with Settings permission on the aamp host.
An OpenRouter account. Any OpenAI-compatible provider works the same way — only the base URL changes.
Outbound network access from the host to the provider endpoint. If the host is air-gapped, use a local provider instead and skip part one.
Part one · Create the API key
Do this at the provider first, so you have the key on the clipboard when the aamp form asks for it. OpenRouter shows a key once and never again.
openrouter.ai
Open API Keys
In your OpenRouter workspace, open the API Keys section.
openrouter.ai · api keys
Click New Key
Start a new key rather than reusing one from another integration — a key per integration is what makes revocation cheap later.
new key
Name it after where it will be used
Something like aamp-host-prod. Name it for the consumer, not the key value — the name is all you will see in the list afterwards.
new key
Set an expiration
Pick a date rather than leaving the key open-ended. A rotation you have to schedule is better than one nobody ever performs.
new key · optional
Set a credit limit and a reset period
This is a hard ceiling at the provider, underneath anything aamp enforces. Useful as a second floor: aamp's loop budgets stop runaway agents, and this stops a runaway key.
new key
Create, then copy the key
Copy it straight to the clipboard. It is shown once; if you lose it, delete the key and make another rather than hunting for it.
Part two · Add the provider in aamp
Back on the host. A provider record is an endpoint, a credential and a type — nothing about behaviour, which belongs to the agent.
aamp console
Open Settings → LLM Providers
Providers are host configuration, so they sit in Settings rather than on an agent.
settings · llm providers
Click New LLM Provider
Choose the OpenAI-compatible provider type. OpenRouter speaks that protocol, which is why no dedicated integration is needed.
new llm provider
Name the provider
OpenRouter is fine. This name is what appears in agent model pickers and in Token Spend logs, so make it the name you want to read in an audit.
new llm provider
Enter the base URL
For OpenRouter that is https://openrouter.ai/api/v1 — the API root, with no trailing path. A self-hosted provider takes its own address here, and that is the single field that decides whether requests leave your network.
new llm provider
Paste the API key
Paste the key you copied in part one. It is written to host storage and redacted everywhere it is displayed afterwards.
new llm provider
Mark it default for this type, then Add Provider
Default-for-type means new agents resolve here without being told. Leave it off if you are adding a second provider for comparison and want existing agents untouched.
Part three · Choose the default model
The provider says where requests go. The default model says which one answers when an agent has no binding of its own.
settings
Open Global Settings
The default model is host-wide, alongside the other settings every agent inherits.
global settings
Search the catalogue and pick a model
Open the model field and type part of the name to filter — the recording searches luna and selects openai/gpt-5.6-luna. The list is whatever your provider exposes, so it changes when the provider does.
global settings
Save Settings
Saving writes the default and takes effect on the next agent turn. No restart.
What the agent inherits
Any agent without its own model binding now resolves to this provider and this model. Bind a different model on the agent itself when one workload needs a larger or cheaper one — that binding wins over the global default.
From the first turn onwards, every request is attributed: Logs → LLM Gateway for the request and response, Logs → Token Spend for tokens and cost per agent and session. If the provider rejects the key, the failure appears there rather than in the agent's reply.
Rotating the key
Replace the credential on the provider record and save; agents pick it up on their next turn. Delete the old key at the provider afterwards, not before — a revoked key mid-run surfaces as a failed turn in the log.
How to set up a chat widget as the interface — the ingress — for your agent. Thirteen steps: configure the connection to the widget server, save the widget's look and copy, then test it on a page and check the theme and size options.
Why the widget is a separate service
The widget server runs as its own binary, intended for DMZ deployment. It holds no database access and no credentials — the shared key below authenticates a tunnel that is outbound from the aamp host, so the public edge can never initiate a connection inward.
Before you start
An operator account with Ingress permission on the aamp host.
The URL the chat widget server is reachable on, and a shared key you have chosen for it.
Step one · Configure the ingress
An ingress defines exposure, not behaviour. Everything set here — transport, authentication, widget copy — leaves the agent record untouched.
mission control
Open your agent
Choose your agent in Mission Control to view its chat and configuration context.
agent
Click Ingress
Open the Ingress section to start configuring the web chat widget integration.
ingress · new
Give it a name, then open Chatwidget Server URL
Enter an instance name, then focus the Chatwidget Server URL field to provide the URL the widget will work on.
ingress · new
Type the shared key
Paste the server URL, then enter the shared key — the password that enables connecting with the widget on that server URL, pre-shared between the two instances.
ingress · webwidget
Configure the look, feel and welcome messages
Type the Title, then the Subtitle and the Welcome Message shown when the panel opens.
ingress · webwidget
Save WebWidget Settings
Check all inputs and settings, then save the WebWidget Settings to finalize the configuration and establish the widget connection.
Step two · Test the widget
Two links appear once the connection is live: the widget itself, and a standalone test page. Use both — one proves the tunnel, the other proves the embed.
ingress · links
Test the widget
Go to Links and open Open Widget or Open Test Page, to preview and verify that it loads and shows basic controls.
your site
Check the widget on your URL
Go to your URL once the agent is added. In the bottom-right corner of the page you should see the bubble; if you don't, refresh the page. Click the bubble to open the chat panel inside the widget and start asking questions.
ingress · links
Click Open Test Page
Open the test page to try the widget end-to-end in a standalone environment.
test page
Type a chat message
Type a test question in the chat textarea to confirm the widget responds correctly.
Step three · Theme and size
The widget's own settings panel switches theme and size at runtime, so you can check the styling against the page it will live on.
widget · settings
Customize your chat widget
Choose Settings and switch the widget theme to Dark to check the chat UI styling.
widget · settings
Click Big
Increase the widget size to Big to validate layout and readability.
widget · settings
Click Normal
Return the widget size to Normal after verifying the Big layout.
What is now exposed
The agent is reachable through one transport, under one policy, with the host still holding the credentials. Add a second ingress for a different audience rather than loosening this one — the same agent can be exposed twice under different rules.
Rotating the shared key
Change the key on both sides in the same maintenance window. The tunnel drops until the values match again, and the widget shows its offline state to end users while it does.
RAG step by step/Launch a RAG knowledge base
Launch a RAG knowledge base
The full click-by-click path from an empty Knowledge tab to an indexed base an agent can cite. Five stages, twenty-six clicks — create the base, add the two helpers indexing depends on, attach them, upload documents, then index and monitor.
Before you start
An operator account with Settings and Knowledge permissions.
The documents you want indexed. This walkthrough uses a single PDF as the example source.
Step one · Create the knowledge base
A knowledge base does not inherit the host default model. It binds its own — because the model that chunks a 200-page manual is rarely the model that should answer a support ticket.
aamp console
Open Knowledge
Open the Knowledge section to start creating and configuring a knowledge base.
knowledge
Click New
Starts a new, empty knowledge base.
new base
Name it, describe it, open the chunking model field
Fill in name and description, then open the Chunking & processing Model selector to pick the model that will process documents.
new base
Set the LLM provider and the processing model
Pick the LLM provider, search the model list — for example type lun — and select the match, such as openai/gpt-5.6-luna, for processing.
new base
Click Create
Creates the base with the configuration set so far. Helpers and prompts are attached next.
SettingsProvider and chunking model are separate fields — the chunking model is loaded live from whichever provider you assign it to.
Step two · Add the indexing helpers
Indexing does not run in the host process. It runs in one-shot helper VMs, so a malformed PDF or a hostile document cannot reach anything else on the host. A base needs at least two tools: one to index, one to fetch and read links.
aamp console
Open Helpers
Go to the Helpers section to add the tools this base will index and read links with.
helpers · new
Select Scratch FS
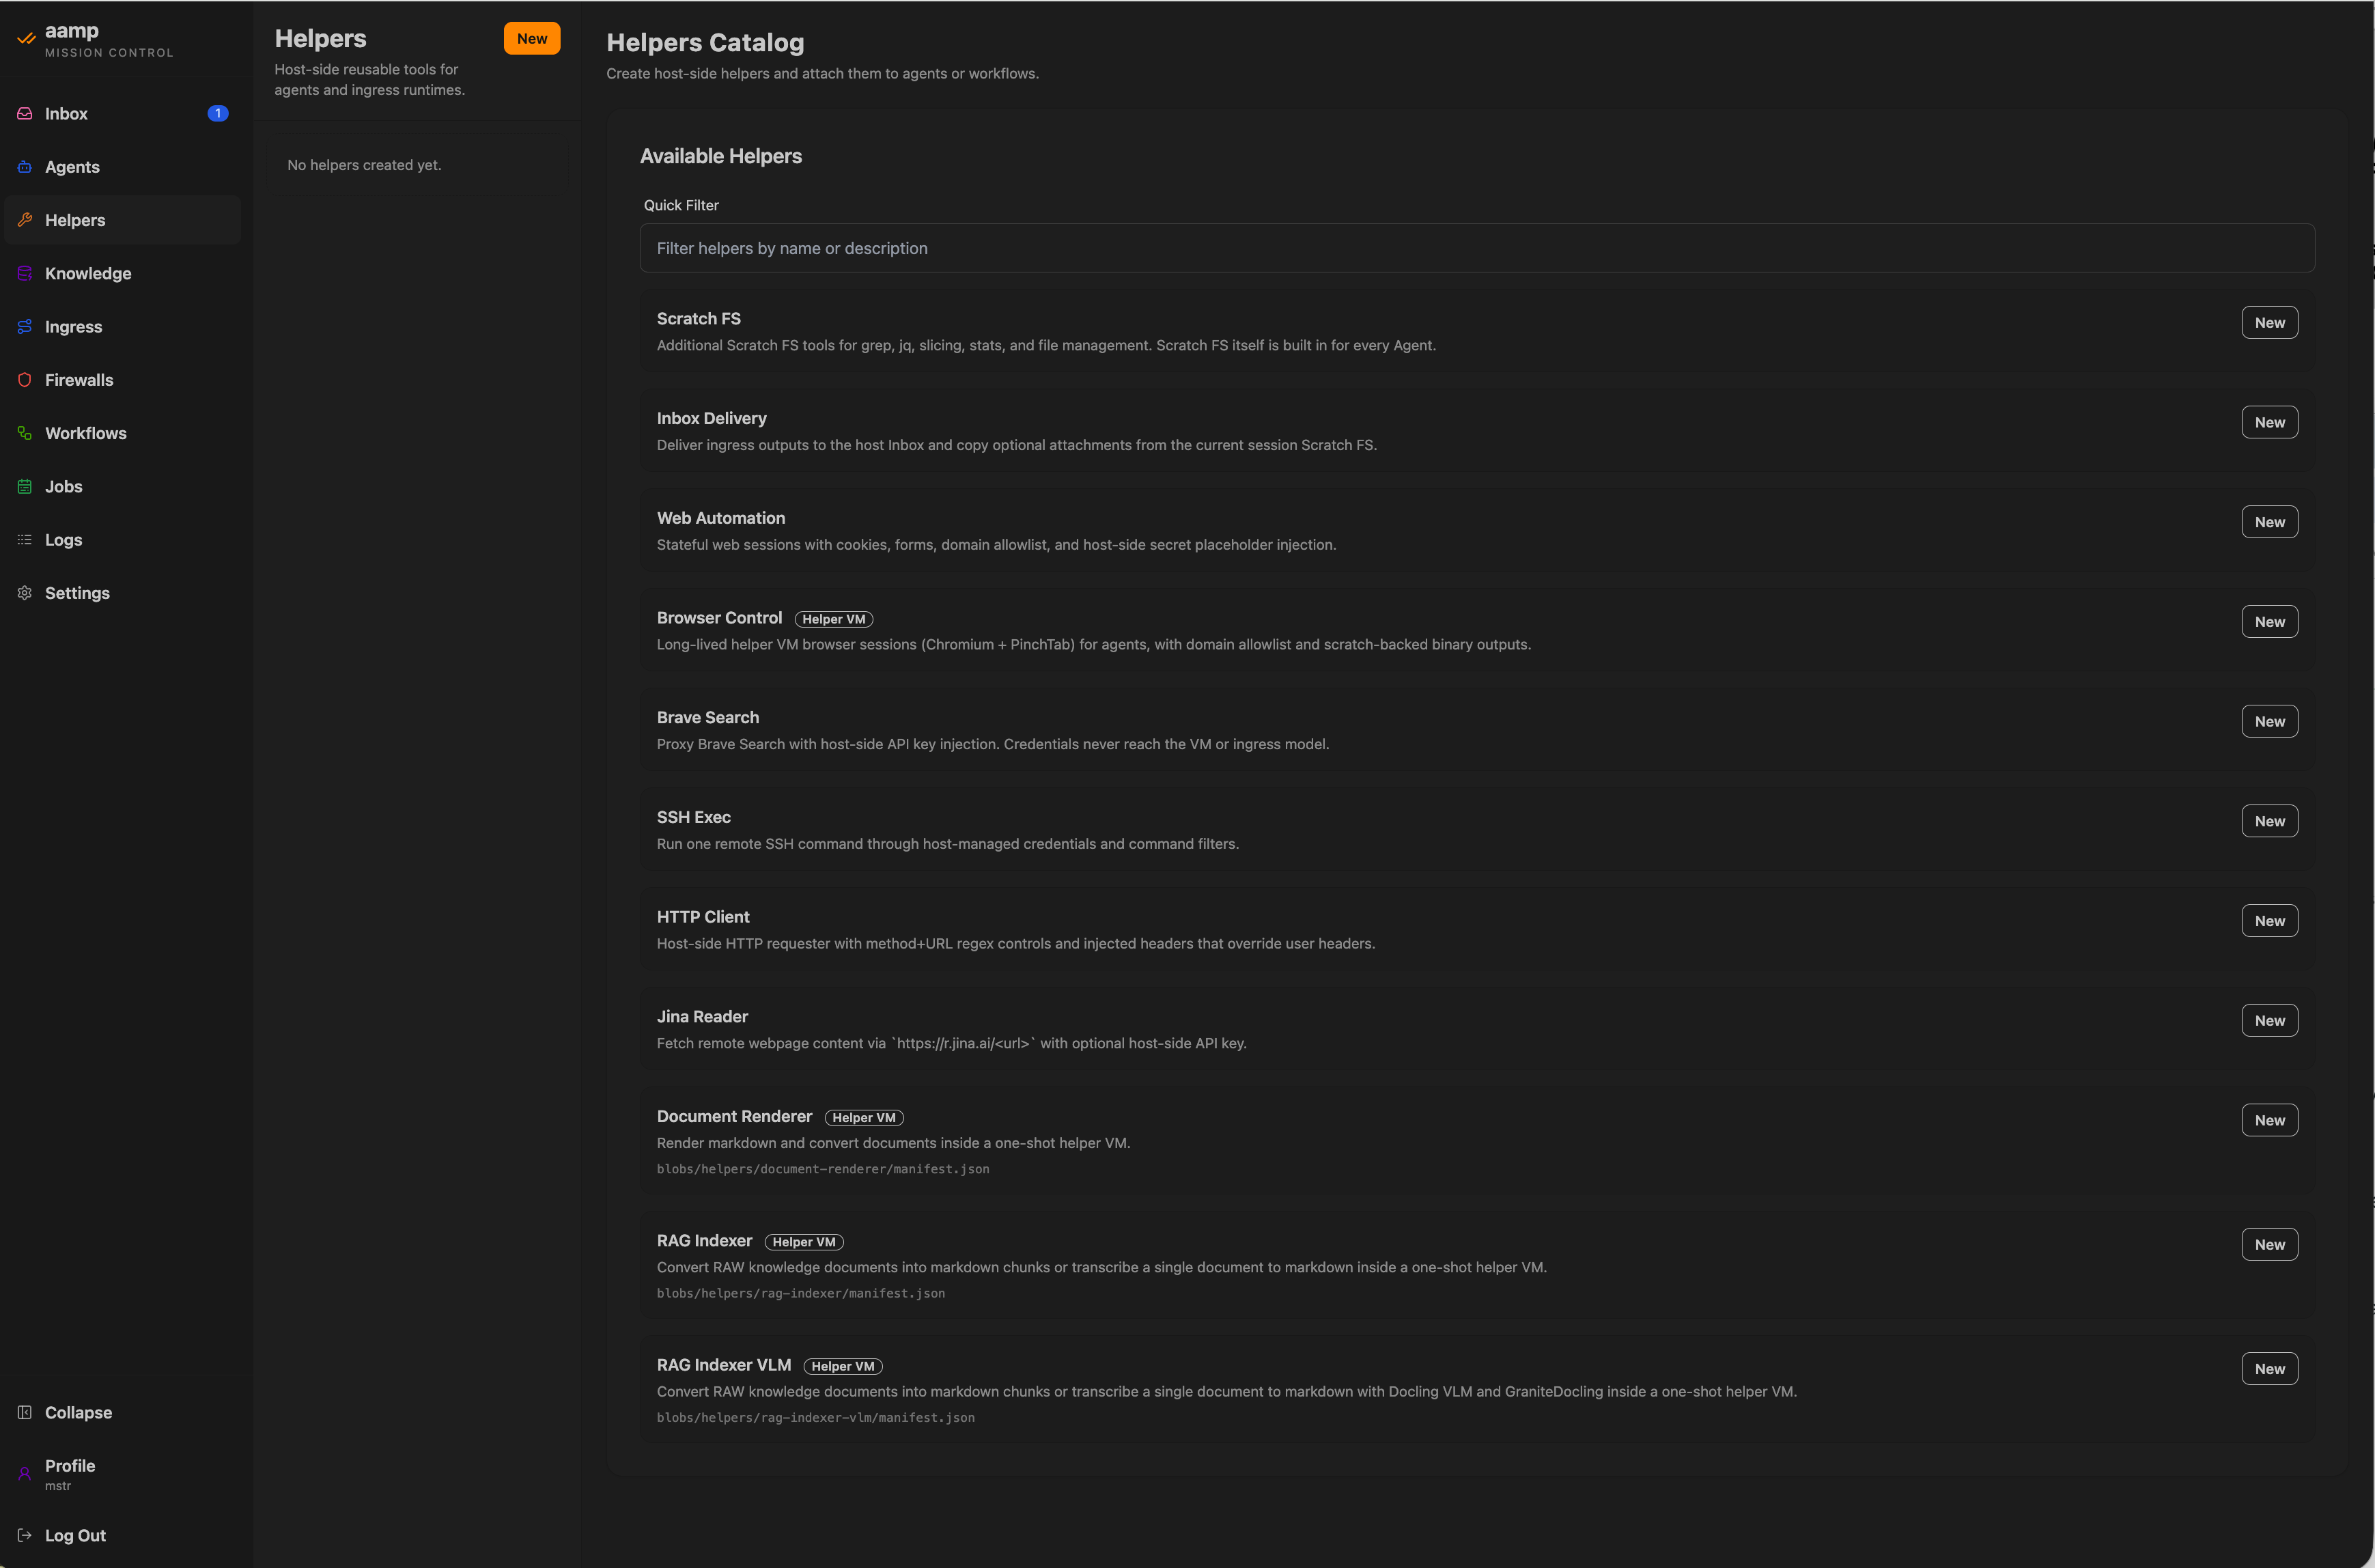
The first tool needed is Scratch FS — grep, jq, slicing, stats and file management. It is built in for every agent, and the RAG Indexer helper is configured on top of it.
new helper
Name it "RAG indexer"
Naming it clearly makes it easy to recognise later, when you attach it to a base.
new helper
Click Create
Saves and creates the RAG indexer helper.
helpers
Click New again
Add a second helper — a reader for fetching content from the web.
helpers · new
Select Jina Reader from the list
Jina Reader fetches URL content and scrapes pages, for sources that live outside your uploaded files.
new helper
Configure it and click Create
Give it a name and, optionally, a prompt, then create the Jina Reader helper.
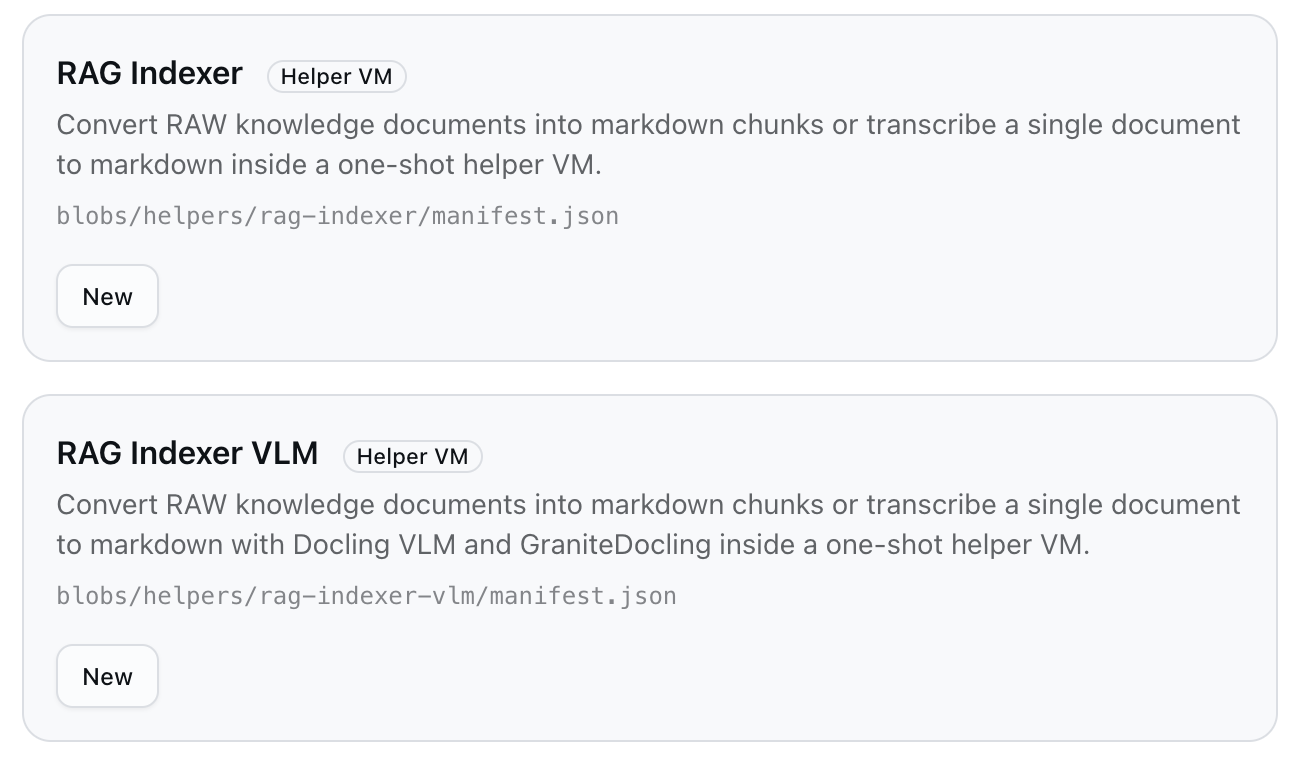
HelpersTwo indexer variants exist: the standard RAG Indexer used here, and a VLM variant that adds Docling and GraniteDocling for scanned or image-based documents.
Step three · Attach the helpers to the base
Creating a helper does not attach it to anything. The base needs to be told which helpers to use.
knowledge
Return to Knowledge
Go back to the base to pin the helpers you just created.
base
Open Settings
Configures the helpers and processing parameters for this specific base.
settings
Select the RAG Indexer Helper VM and the Jina Reader Helper
Pick the RAG Indexer helper VM as required, and the Jina Reader helper as optional — together they give the base a structure to extract into and a way to reach URLs.
settings
Click Save
Saves the attached helpers to the base's settings.
Step four · Upload documents
knowledge · base
Open the Knowledge tab
Switch to the tab where raw files are added to the base.
knowledge · base
Click Upload
Starts adding documents to the knowledge base. Documents can come from disk or from other sources.
upload
Choose RAW files to upload
Pick the raw file from disk to queue it for upload.
upload
Click Upload to confirm
Confirms sending the selected file to the base.
upload
Repeat file selection for additional documents
Point the file picker at another file to queue it as well.
upload
Click Upload again
Confirms adding the next file to the base.
raw files
Select an uploaded file to confirm it landed
Click the uploaded file in the RAW files list — its name, type and size confirm it is queued for indexing.
Step five · Index and monitor
base
Click Index Full Base
Sends every raw file to the RAG helper VM for indexing, now that documents are uploaded.
base
Watch the progress bar
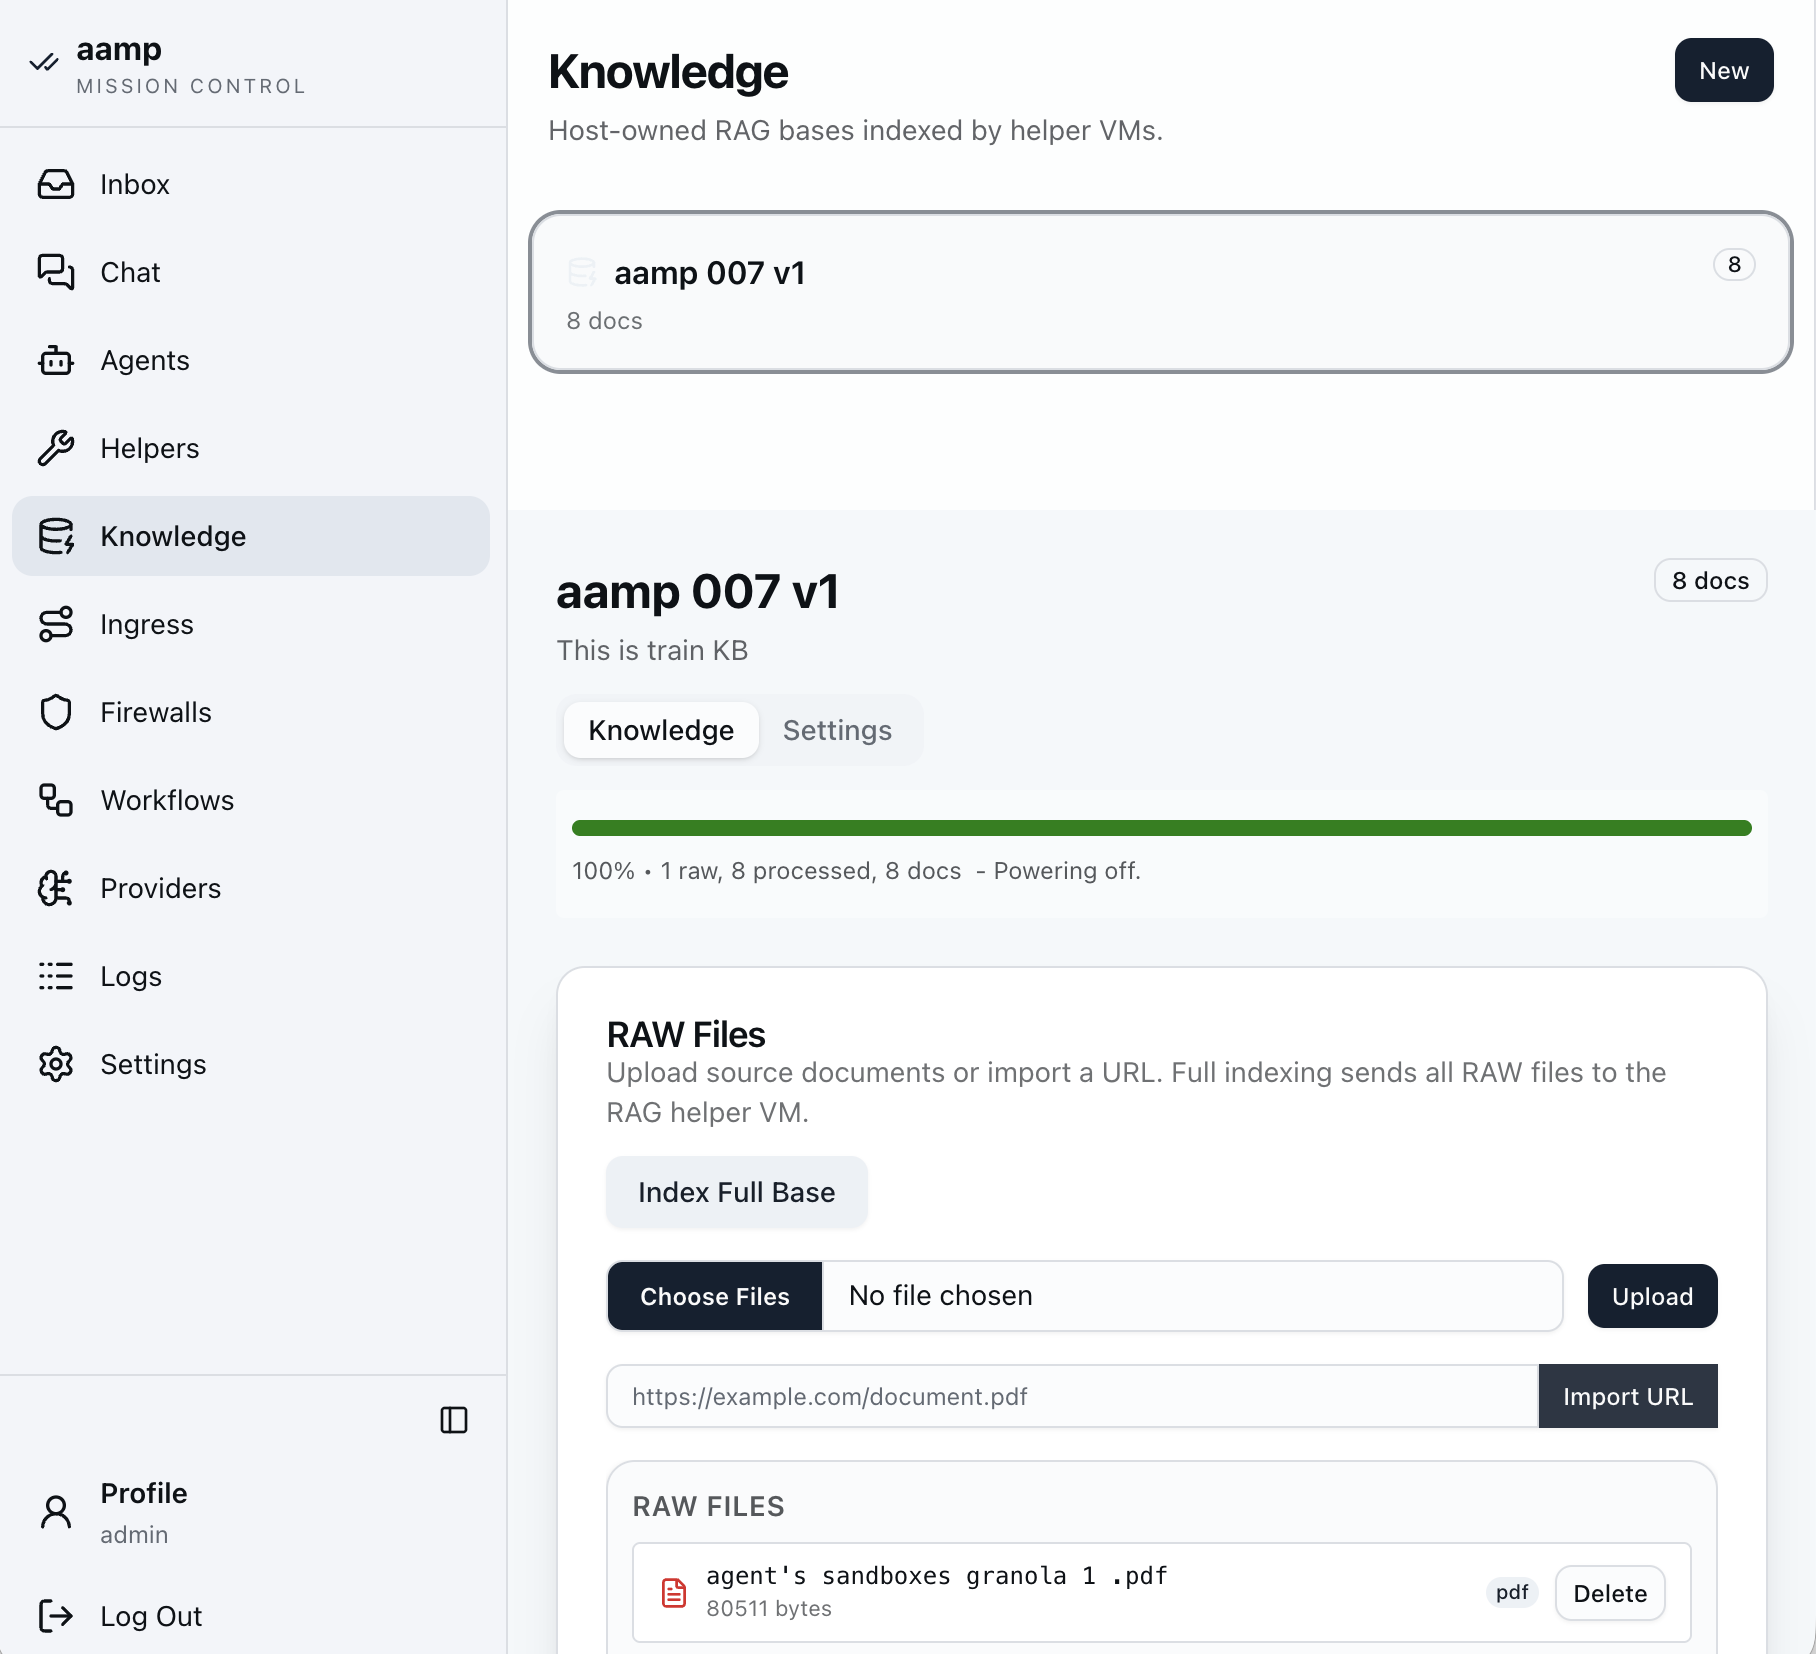
The green bar tracks raw, processed and doc counts. Run Index Full Base again after adding or changing documents.
base · docs
Open an indexed file to check it
Click any processed document to view its markdown chunks and confirm indexing worked as expected.
KnowledgeIndexing status is explicit — raw count, processed count, doc count — so a stalled or partial index is visible rather than silent.
After indexing · monitor and fine-tune
The base is not a set-and-forget asset. Two places to watch it:
Logs → RAG Inference and RAG Indexing — per-query retrieval and per-document indexing events, filterable by date, agent and session.
Logs → Token Spend — chunking and query-time inference cost, broken down by provider and by model.
If answers come back thin, revisit the chunk prompt before the inference prompt — most retrieval quality problems are extraction problems wearing a query problem's clothes.
On re-indexing
Changing the chunk prompt does not retroactively rewrite existing chunks. Re-run Index Full Base after a prompt change to apply it to documents already in the base.
DataLake/Work with AI on datasets
Work with AI on datasets
How to turn a raw dataset into something an agent can query. Twenty-eight steps: create the dataset and publish a version, build an Association Recommender on top of it, then attach it to an agent as a data product and chat against it.
The DataLake, and dataset vs. data product
The DataLake is aamp's versioned analytical layer, built on DuckDB, DuckLake and Parquet — the same host-governed model as knowledge and secrets, applied to tabular data. Inside it, a dataset is versioned data with a name, a SQL slug and an upload history; a data product is a model built on a dataset, such as the Association Recommender used here, that an agent can call at chat time. One dataset can back more than one product.
Step one · Create the dataset
Datasets live under Knowledge, alongside document collections. Naming and the SQL slug are set once at creation.
inbox
Open Inbox
Open the Inbox section to start navigating to knowledge and data setup.
inbox
Open Knowledge
Switch to the Knowledge area to access data creation options.
knowledge
Click New, then New Dataset
Click New to begin creating a new data asset, then choose New Dataset to start defining it.
dataset · new
Name it, then set the SQL slug and description
Enter the dataset name, a SQL slug, and a description that defines the dataset metadata.
dataset · new
Click Create Dataset
Click Create Dataset to save the definition and proceed to versioning.
Step two · Upload & publish a version
A dataset holds no rows until a version is uploaded. Preview before publishing — publishing is what makes the version queryable.
dataset · overview
Click Upload a version
Open Upload a version to add the first data file for this dataset.
dataset · upload
Provide the file and preview it
Start the upload, then click Upload and preview to check the parsed columns before committing.
dataset · upload
Click Upload and preview
Confirm to validate the uploaded version before publishing.
dataset · upload
Click Import and publish
Import and publish ingests the data and makes the dataset version available to query.
Step three · Build a recommender
The Association Recommender is a data product: it sits on top of the dataset and needs three fields mapped before it can build.
dataset · overview
Back to Overview, then New
Return to Overview, then click New to create a data product on this dataset.
data product · new
Choose Association Recommender, then New
Select the Association Recommender product type, then click New to start building it.
recommender · new
Select the dataset, name it, and set the slug
Pick the source dataset, then enter a name and slug for the recommender.
recommender · new
Click Create & Build
Initialize the recommender configuration workflow.
recommender · fields
Map Transaction ID, Product ID, and Category
Map Transaction ID and Product ID, and optionally Category, to define the purchase-basket structure.
recommender · fields
Click Create & Build, then Save & Rebuild
Generate the recommender from the field mappings, then Save & Rebuild to apply changes and recompute recommendations.
Step four · Attach it to an agent
The recommender is only useful once an agent can reach it. Attaching a data product doesn't change the agent's model or ingress — only what it can query.
agent · chat
Open the agent's chat, then Data Products
Open the agent's Data Products tab to review available datasets and products.
agent · data products
Select the dataset and the recommender
Open the Datasets picker and select the dataset, then select the recommender product to attach.
agent · chat
Click NEW and ask a question
Start a fresh chat session and type a question that draws on the attached data product — include what output you expect.
Rebuilding after a new version
Publishing a new dataset version doesn't rebuild the recommender automatically. Return to the product and click Save & Rebuild whenever the underlying data changes materially, or the agent keeps answering against the stale version.
Guardrails/Configure and test guardrails
Configure and test guardrails
How to create a guardrail, attach it to an agent's chat surface, and prove it works. Then the same for a PII filter on the outbound side. Every verdict lands in the logs, where you can inspect the raw classifier output against the exact content it judged.
Inbound guardrail vs. outbound PII filter
A guardrail evaluates the user's message before it reaches the agent's model, and blocks it with a refusal message you write. A PII filter works on the other boundary: it runs after generation and redacts identifiers before the answer is delivered. Both are reusable policies — create once, attach per agent and per surface.
Step one · Create the guardrail
Guardrails live in their own section. A guardrail needs a name and an evaluating model; the model is what judges each incoming message against the policy.
guardrails
Click New Guardrail
Open the Guardrails section and click New Guardrail.
guardrails · new
Click New
Confirm with New to start defining the guardrail.
guardrails · new
Type the guardrail name
Give it a name that says what it protects — the name is what you will pick from when attaching it to an agent.
guardrails · new
Select the LLM provider and model
Choose the LLM provider as usual, then open Model and Select model. Search for the model you want to evaluate with and pick it from the list.
guardrails · new
Click Create Guardrail
Save the guardrail. It now exists as a policy, but is not yet attached to anything.
Step two · Attach it to an agent
A guardrail does nothing until a surface points at it. Attach it per agent, per surface — here, the agent's chat.
agents
Open Agents
Go to Agents and open the agent you want to protect.
agent · settings
Open Settings
Switch to the agent’s Settings tab.
agent · security
Select the guardrail for Chat
Pick your guardrail on the Chat surface. Each surface is assigned separately — API and widget are their own choices.
agent · security
Click Save Security
Save. The guardrail is now live on that surface.
agent · flow
Check the agent flow canvas
Open Chat and Flow — the guardrail appears as a box on the canvas, wired in ahead of the model.
Step three · Test the block
Send something the policy should refuse. A working guardrail returns your refusal message instead of a model answer.
agent · chat
Start a new session
In the agent’s chat, click NEW to open a clean session.
agent · chat
Type a test question
Enter a prompt your policy should reject — a jailbreak attempt or an out-of-scope request.
agent · chat
Watch the request get blocked
The agent answers with the refusal message rather than the model’s output. The request never reached the model.
guardrails
Adjust the type and save
Back in the guardrail, select a different Type if you want another evaluator, then Save Settings and re-test.
Step four · Inspect the verdict in the logs
Every evaluation is recorded with its reason, categories and the content it judged. This is the audit trail a compliance review asks for.
settings · logs
Open Settings, then Logs
Go to Settings and open Logs.
logs · guardrails
Open the Guardrails tab
Switch to the Guardrails log domain to see the verdicts.
logs · guardrails
Click Inspect on the entry
Open Inspect on the blocked request.
logs · inspect
Read the raw output and inspected content
Expand Raw classifier output and Inspected content to see exactly what the evaluator returned and what it was given.
Step five · Add an outbound PII filter
The same pattern on the other boundary: create the filter, attach it to a surface, then confirm the answer comes back anonymized.
guardrails · pii
Click New
In the PII filter area, click New to create an anonymization filter.
pii filter · new
Select the type, then Create PII Filter
Choose the filter Type — deterministic detection or model-delegated redaction — then click Create PII Filter.
agent · security
Open the agent’s Security tab
Go back to Agents and open Security on the agent.
agent · security
Select it for Chat, then Save Security
Assign the PII filter to the Chat surface and click Save Security.
agent · chat
Start a session and send a prompt with identifiers
Click Test, open a New session, and send content containing names, emails or account numbers.
agent · chat
Confirm the data comes back anonymized
Identifiers are replaced with explicit placeholders while the meaning of the answer survives.
Test after every policy change
Changing the evaluator type or the policy prompt changes what gets blocked. Re-run your test prompts after each edit, and check the Guardrails log to confirm the verdict is the one you intended — a policy that fails open is worse than no policy, because it looks like it is working.